
InfrastructureAsCode

Tricking Terraform to test your infrastructure locally in seconds

There is a very specific type of agony associated with waiting for cloud resources to spin up. You write your infrastructure code, you push it to the server, you stare at a loading spinner, and you visibly age. By the time your database is finally ready to accept connections, you have completely forgotten why you needed a database in the first place.

Real infrastructure lives in Terraform. If local development is going to be genuinely useful to us, it needs to speak that exact same language. But we do not want to wait, and we certainly do not want to pay Jeff Bezos every time we run a unit test.

The solution is an elaborate digital heist. We are going to put a pair of virtual reality goggles on Terraform so it believes it is negotiating with the almighty AWS billing engine. In reality, it will be chatting with a humble local container running MiniStack on your laptop. Terraform will behave exactly as it would against the real cloud, totally oblivious to our little conspiracy.

This guide covers two distinct crimes against cloud computing. First, we will point your actual Terraform configuration at MiniStack instead of a real AWS account. Second, we will use that same setup to run full integration tests on your machine in seconds.

Constructing the cardboard storefront

MiniStack acts as a drop-in endpoint override for Terraform. You do not need a special plugin, and you can skip the usual agonizing authentication dance involving temporary tokens and multi-factor prompts. You simply point the AWS provider at your localhost port 4566, hand it some aggressively fake credentials, and let it do its job.

The most explicit way to pull off this trick is by adding an endpoints block to your provider configuration. This acts like a fake storefront, redirecting Terraform’s serious API calls into our local container.

provider "aws" {
  region                      = "eu-central-1"
  access_key                  = "fake_access_key"
  secret_key                  = "fake_secret_key"
  s3_use_path_style           = true
  skip_credentials_validation = true
  skip_metadata_api_check     = true
  skip_requesting_account_id  = true
endpoints {
    s3       = "http://localhost:4566"
    dynamodb = "http://localhost:4566"
    sqs      = "http://localhost:4566"
    lambda   = "http://localhost:4566"
    iam      = "http://localhost:4566"
  }
}

I prefer starting with this explicit block because it is completely transparent. You can see exactly which services are being hijacked and sent to your local machine. If you only list the specific services you are actually using, this block conveniently doubles as a tidy inventory of your stack.

If you prefer to avoid maintaining this list by hand, a handy Python wrapper called tflocal will generate it for you automatically. You just install it via pip and run tflocal apply instead of your usual Terraform commands. It behaves identically, making it an easy substitute in any workflow.

Hiding the heavy machinery in the basement

It is incredibly tempting to spin up a Lambda function, a message queue, and a database using a dozen individual command-line instructions. That is fine for a quick afternoon experiment, but it is a terrible way to manage real software.

A production environment requires these resources to be properly defined in Terraform. I will spare you the visual trauma of scrolling through a massive hundred-line configuration file. I have placed the entire, glorious, fully functional Terraform manifest in a GitHub repository for those who enjoy copying and pasting wholesale infrastructure.

For the sake of our sanity here, let us just look at a tiny slice of the pie. We want to provision a DynamoDB table for tracking lost laundry items and a Lambda function to process them. Here is how standard and boring the configuration looks, completely devoid of any local-testing hacks.

resource "aws_dynamodb_table" "lost_laundry" {
  name         = "lost_socks_inventory"
  billing_mode = "PAY_PER_REQUEST"
  hash_key     = "sock_id"

  attribute {
    name = "sock_id"
    type = "S"
  }
}
resource "aws_lambda_function" "laundry_worker" {
  function_name = "sock_matcher"
  runtime       = "nodejs20.x"
  handler       = "index.handler"
  role          = aws_iam_role.dummy_lambda_role.arn
  filename      = "${path.module}/../sock_matcher_code.zip"
  
  environment {
    variables = {
      TABLE_NAME = aws_dynamodb_table.lost_laundry.name
    }
  }
}

When you run an apply command against this setup, it creates the resources locally. They are reproducible, they are safely version-controlled, and they are mathematically identical in shape to whatever you will eventually deploy to a real data center.

Poking the mirage with actual code

Here is where this bizarre local loop graduates from a neat party trick to a genuinely powerful tool. You can spin up MiniStack, apply your Terraform configuration, run real integration tests against the provisioned resources, and tear it all down.

Instead of clicking through a web console and waiting for a database to spawn while your coffee slowly turns into iced coffee, everything happens locally. A minimal Jest integration test hitting our fake infrastructure looks exactly like a real one.

const { SQSClient, SendMessageCommand } = require('@aws-sdk/client-sqs');
const { DynamoDBClient, GetItemCommand } = require('@aws-sdk/client-dynamodb');

const localConfig = {
  endpoint: 'http://localhost:4566',
  region: 'eu-central-1',
  credentials: { accessKeyId: 'fake', secretAccessKey: 'fake' },
};

const sqs = new SQSClient(localConfig);
const dynamo = new DynamoDBClient(localConfig);

test('worker processes a lost sock notification into the database', async () => {
  await sqs.send(new SendMessageCommand({
    QueueUrl: 'http://localhost:4566/000000000000/laundry_queue',
    MessageBody: JSON.stringify({ sock_id: 'argyle-001', status: 'missing' }),
  }));

  // Wait a brief moment for the event mapping to trigger our Lambda
  await new Promise((resolve) => setTimeout(resolve, 2000));

  const result = await dynamo.send(new GetItemCommand({
    TableName: 'lost_socks_inventory',
    Key: { sock_id: { S: 'argyle-001' } },
  }));

  expect(result.Item).toBeDefined();
  expect(result.Item.status.S).toEqual('missing');
});

This is the beautiful part. This test is not hitting a polite JavaScript mock or a hardcoded stub. It is sending a real message payload through a real routing queue, triggering an actual local Lambda invocation, and reading the resulting data back out of a local DynamoDB instance. It does all of this in the fraction of a second it takes a normal test suite to run.

The automated sandcastle stomping machine

Running this locally is great for your own mental health, but wiring it into Continuous Integration is where the real magic happens. Every single pull request can now provision a full copy of your infrastructure, run tests against it, and destroy it.

Building this up just to immediately tear it down is the digital equivalent of constructing an architecturally flawless sandcastle and then joyfully stomping on it.

jobs:
  phantom-integration-tests:
    runs-on: ubuntu-latest
    services:
      ministack:
        image: ministackorg/ministack:latest
        ports:
          - 4566:4566
    steps:
      - name: Checkout the laundry code
        uses: actions/checkout@v4

      - name: Install Terraform
        uses: hashicorp/setup-terraform@v3

      - name: Build the fake infrastructure
        run: |
          cd infrastructure
          terraform init
          terraform apply -auto-approve

      - name: Run the integration suite
        run: npm run test:integration

No AWS account is ever touched. No unexpected bills arrive at the end of the month. No developer sits around waiting five minutes for a queue to provision just to find out they made a typo in a variable name.

Incompetent security guards and other minor tragedies

There are a few sharp edges to this workflow that you should know about before you fully commit to the illusion.

First, we need to talk about Terraform state handling. You must decide up front whether your local Terraform state should persist between runs or reset every time. For CI environments, you absolutely want a blank canvas. Both the Terraform state and the MiniStack container state should be annihilated on every run. Do not try to recycle a local terraform.tfstate file across automated runs.

Second, we need to address the elephant in the room regarding permissions. MiniStack is wonderful, but when it comes to Identity and Access Management, it acts like a nightclub bouncer who is asleep on a barstool. MiniStack will happily let Terraform create a role with entirely incorrect permissions. Your Lambda could be given a policy that only allows it to read from an S3 bucket, but MiniStack will still let it write to DynamoDB.

Your integration tests will pass with flying colors because MiniStack simply does not enforce IAM boundaries strictly. A green test suite in this local setup confirms that your application logic works flawlessly. It absolutely does not confirm that your IAM policies are correct. You still need a real cloud environment, or a dedicated policy linter, to prevent a permissions disaster in production.

Finally, beware of provider version drift. MiniStack tracks the AWS API closely, but if you upgrade to the absolute newest Terraform provider the day it is released, there might be a short lag before new resource attributes are supported locally. If an apply command suddenly fails with an unrecognized attribute error, check your provider versions before you start questioning your own sanity.

We have reached a point where the local development loop is actually pleasant. We can define our infrastructure, apply it against a local container, run real integration tests against local services, and tear it all down on every single code change. We get all the confidence of testing against the cloud with none of the waiting, and more importantly, none of the invoices.

Why Crossplane is the Kubernetes therapy your multi-cloud setup needs

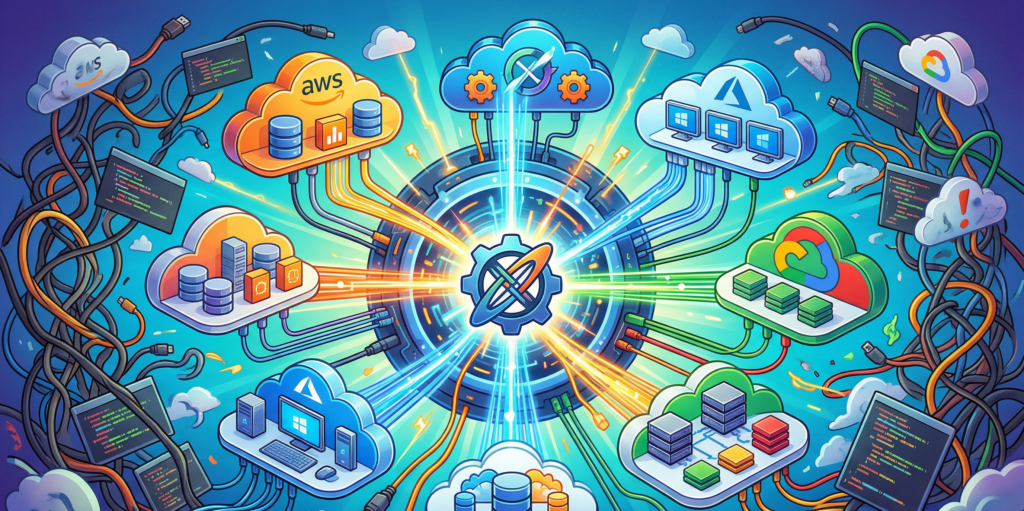
Let us be perfectly honest about multi-cloud environments. They are not a harmonious symphony of computing power. They are a logistical nightmare, roughly equivalent to hosting a dinner party where one guest only eats raw vegan food, another demands a deep-fried turkey, and the third will only consume blue candy. You are running around three different kitchens trying to keep everyone alive and happy while speaking three different languages.

For years, we relied on Terraform or its open-source sibling OpenTofu to manage this chaos. These tools are fantastic, but they come with a terrifying piece of baggage known as the state file. The state file is essentially a fragile, highly sensitive diary holding the deepest, darkest secrets of your infrastructure. If that file gets corrupted or someone forgets to lock it, your cloud provider develops sudden amnesia and forgets where it put the database.

Kubernetes evolved quite a bit while we were busy babysitting our state files. It stopped being just a container orchestrator and started trying to run the whole house. Every major cloud provider released their own Kubernetes operator. Suddenly, you could manage a storage bucket or a database directly from inside your cluster. But there was a catch. The operators refused to speak to each other. You essentially hired a team of brilliant specialists who absolutely hate each other.

This is exactly where Crossplane steps in to act as the universal, unbothered therapist for your infrastructure.

Meet your new obsessive infrastructure butler

Crossplane does not care about vendor rivalries. It installs itself into your Kubernetes cluster and uses the native Kubernetes reconciliation loop to manage your external cloud resources.

If you are unfamiliar with the reconciliation loop, think of it as an aggressively helpful, obsessive-compulsive butler. You hand this butler a piece of YAML paper stating that you require a specific storage bucket in a specific region. The butler goes out, builds the bucket, and then stands there staring at it forever. If a rogue developer logs into the cloud console and manually deletes that bucket, the butler simply builds it again before the developer has even finished their morning coffee. It is relentless, slightly unnerving, and exactly what you want to keep your infrastructure in check.

Because Crossplane lives inside Kubernetes, you do not need to run a separate pipeline just to execute an infrastructure plan. The cluster itself is the engine. You declare what you want, and the cluster makes reality match your desires.

The anatomy of a multi-cloud combo meal

To understand how this actually works without getting bogged down in endless documentation, you only need to understand three main concepts.

First, you have Providers. These are the translator modules. You install the AWS Provider, the Azure Provider, or the Google Cloud Provider, and suddenly your Kubernetes cluster knows how to speak their specific dialects.

Next, you have Managed Resources. These are the raw ingredients. A single virtual machine, a single virtual network, or a single database instance. You can deploy these directly, but asking a developer to configure twenty different Managed Resources just to get a working application is like handing them a live chicken, a sack of flour, and telling them to make a sandwich.

This brings us to the real magic of Crossplane, which is the Composite Resource.

Composite Resources allow you to bundle all those raw ingredients into a single, easy-to-digest package. It is the infrastructure equivalent of a fast-food drive-through. A developer does not need to know about subnets, security groups, or routing tables. They just submitted a claim for a “Standard Web Database” value meal. Crossplane takes that simple request and translates it into the complex web of resources required behind the scenes.

Looking at the code without falling asleep

To prove that this is not just theoretical nonsense, let us look at what it takes to command two completely different cloud providers from the exact same place.

Normally, doing this requires switching between different tools, authenticating multiple times, and praying you do not execute the wrong command in the wrong terminal. With Crossplane, you just throw your YAML files into the cluster.

Here is a sanitized, totally harmless example of how you might ask AWS for a storage bucket.

apiVersion: s3.aws.upbound.io/v1beta1
kind: Bucket
metadata:
  name: acme-corp-financial-reports
spec:
  forProvider:
    region: eu-west-1
  providerConfigRef:
    name: aws-default-provider

And right next to it, in the exact same directory, you can drop this snippet to demand a Resource Group from Azure.

apiVersion: azure.upbound.io/v1beta1
kind: ResourceGroup
metadata:
  name: rg-marketing-dev-01
spec:
  forProvider:
    location: West Europe
  providerConfigRef:
    name: azure-default-provider

You apply these manifests, and Crossplane handles the authentication, the API calls, and the aggressive babysitting of the resources. No Terraform state file is required. It is completely stateless GitOps magic.

The ugly truth about operating at scale

Of course, getting rid of the state file is like going to a music festival without a cell phone. It sounds incredibly liberating until you lose your friends and cannot find your way home.

Operating Crossplane at scale is not always a walk in the park. When things go wrong during provisioning, and they absolutely will go wrong, you do not get a neatly formatted error summary. Because there is no central state file to reference, finding out why a resource failed requires interrogating the Kubernetes API directly.

You type a command to check the status of your resources, and the cluster vomits a massive wall of text onto your screen. It is like trying to find a typo in a phone book while someone shouts at you in a foreign language. Running multiple kubectl commands just to figure out why an Azure database refused to spin up gets very old, very fast.

To survive this chaos, you cannot rely on manual terminal commands. You must pair Crossplane with a dedicated GitOps tool like ArgoCD or FluxCD.

These tools act as the adult in the room. They keep track of what was actually deployed, provide a visual dashboard, and translate the cluster’s internal panic into something a human being can actually read. They give you the visibility that Crossplane lacks out of the box.

Ultimately, moving to Crossplane is a paradigm shift. It requires letting go of the comfortable, procedural workflows of traditional infrastructure as code and embracing the chaotic, eventual consistency of Kubernetes. It has a learning curve that might make you pull your hair out initially, but once you set up your Composite Resources and your GitOps pipelines, you will never want to go back to juggling state files again.

The lazy cloud architect guide to AWS automation

The shortcuts I use on every project now, after learning that scale mostly changes the bill, not the mistakes.

Let me tell you how this started. I used to measure my productivity by how many AWS services I could haphazardly stitch together in a single afternoon. Big mistake.

One night, I was deploying what should have been a boring, routine feature. Nothing fancy. Just basic plumbing. Six hours later, I was still babysitting the deployment, clicking through the AWS console like a caffeinated lab rat, re-running scripts, and manually patching up tiny human errors.

That is when the epiphany hit me like a rogue server rack. I was not slow because AWS is a labyrinth of complexity. I was slow because I was doing things manually that AWS already knows how to do in its sleep.

The patterns below did not come from sanitized tutorials. They were forged in the fires of shipping systems under immense pressure and desperately wanting my weekends back.

Event-driven everything and absolutely no polling

If you are polling, you are essentially paying Jeff Bezos for the privilege of wasting your own time. Polling is the digital equivalent of sitting in the backseat of a car and constantly asking, “Are we there yet?” every five seconds.

AWS is an event machine. Treat it like one. Instead of writing cron jobs that anxiously ask the database if something changed, just let AWS tap you on the shoulder when it actually happens.

Where this shines:

  • File uploads
  • Database updates
  • Infrastructure state changes
  • Cross-account automation

Example of reacting to an S3 upload instantly:

def lambda_handler(event, context):
    for record in event['Records']:
        bucket_name = record['s3']['bucket']['name']
        object_key = record['s3']['object']['key']

        # Stop asking if the file is there. AWS just handed it to you.
        trigger_completely_automated_workflow(bucket_name, object_key)

No loops. No waiting. Just action.

Pro tip: Event-driven systems fail less frequently simply because they do less work. They are the lazy geniuses of the cloud world.

Immutable deployments or nothing

SSH is not a deployment strategy. It is a desperate cry for help.

If your deployment plan involves SSH, SCP, or uttering the cursed phrase “just this one quick change in production”, you do not have a system. You have a fragile ecosystem built on hope and duct tape. I stopped “fixing” servers years ago. Now, I just murder them and replace them with fresh clones.

The pattern is brutally simple:

  1. Build once
  2. Deploy new
  3. Destroy old

Example of launching a new EC2 version programmatically:

import boto3

ec2_client = boto3.client('ec2', region_name='eu-west-1')
response = ec2_client.run_instances(
    ImageId='ami-0123456789abcdef0', # Totally fake AMI
    InstanceType='t3a.nano',
    MinCount=1,
    MaxCount=1,
    TagSpecifications=[{
        'ResourceType': 'instance',
        'Tags': [{'Key': 'Purpose', 'Value': 'EphemeralClone'}]
    }]
)

It is like doing open-heart surgery. Instead of trying to fix the heart while the patient is running a marathon, just build a new patient with a healthy heart and disintegrate the old one. When something breaks, I do not debug the server. I debug the build process. That is where the real parasites live.

Infrastructure as code for the forgettable things

Most teams only use IaC for the big, glamorous stuff. VPCs. Kubernetes clusters. Massive databases.

This is completely backwards. It is like wearing a bespoke tuxedo but forgetting your underwear. The small, forgettable resources are the ones that will inevitably bite you when you least expect it.

What I automate with religious fervor:

  • IAM roles
  • Alarms
  • Schedules
  • Policies
  • Log retention

Example of creating a CloudWatch alarm in code:

cloudwatch.put_metric_alarm(
    AlarmName="QueueIsExploding",
    MetricName="ApproximateNumberOfMessagesVisible",
    Namespace="AWS/SQS",
    Threshold=10000,
    ComparisonOperator="GreaterThanThreshold",
    EvaluationPeriods=1,
    Period=300,
    Statistic="Sum"
)

If it matters in production, it lives in code. No exceptions.

Let Step Functions own the flow

Early in my career, I crammed all my business logic into Lambdas. Retries, branching, timeouts, bizarre edge cases. I treated them like a digital junk drawer.

I do not do that anymore. Lambdas should be as dumb and fast as a golden retriever chasing a tennis ball.

The new rule: One Lambda equals one job. If you need a workflow, use Step Functions. They are the micromanaging middle managers your architecture desperately needs.

Example of a simple workflow state:

{
  "Type": "Task",
  "Resource": "arn:aws:lambda:eu-west-1:123456789012:function:DoOneThingWell",
  "Retry": [
    {
      "ErrorEquals": ["States.TaskFailed"],
      "IntervalSeconds": 3,
      "MaxAttempts": 2
    }
  ],
  "Next": "CelebrateSuccess"
}

This separation makes debugging highly visual, makes retries explicit, and makes onboarding the new guy infinitely less painful. Your future self will thank you.

Kill cron jobs and use managed schedulers

Cron jobs are perfectly fine until they suddenly are not.

They are the ghosts of your infrastructure. They are completely invisible until they fail, and when they do fail, they die in absolute silence like a ninja with a sudden heart condition. AWS gives you managed scheduling. Just use it.

Why this is fundamentally faster:

  • Central visibility
  • Built-in retries
  • IAM-native permissions

Example of creating a scheduled rule:

eventbridge.put_rule(
    Name="TriggerNightlyChaos",
    ScheduleExpression="cron(0 2 * * ? *)",
    State="ENABLED",
    Description="Wakes up the system when nobody is looking"
)

Automation should be highly observable. Cron jobs are just waiting in the dark to ruin your Tuesday.

Bake cost controls into automation

Speed without cost awareness is just a highly efficient way to bankrupt your employer. The fastest teams I have ever worked with were not just shipping fast. They were failing cheaply.

What I automate now with the ruthlessness of a debt collector:

  • Budget alerts
  • Resource TTLs
  • Auto-shutdowns for non-production environments

Example of tagging resources with an expiration date:

ec2.create_tags(
    Resources=['i-0deadbeef12345678'],
    Tags=[
        {"Key": "TerminateAfter", "Value": "2026-12-31"},
        {"Key": "Owner", "Value": "TheVoid"}
    ]
)

Leaving resources without an owner or an expiration date is like leaving the stove on, except this stove bills you by the millisecond. Anything without a TTL is just technical debt waiting to invoice you.

A quote I live by: “Automation does not cut costs by magic. It cuts costs by quietly preventing the expensive little mistakes humans call normal.”

The death of the cloud hero

These patterns did not make me faster because they are particularly clever. They made me faster because they completely eliminated the need to make decisions.

Less clicking. Less remembering. Absolutely zero heroics.

If you want to move ten times faster on AWS, stop asking what to build next. Once automation is in charge, real speed usually arrives as work you no longer have to remember.

The great AWS Tag standoff

You tried to launch an EC2 instance. Simple task. Routine, even.  

Instead, AWS handed you an AccessDenied error like a parking ticket you didn’t know you’d earned.  

Nobody touched the IAM policy. At least, not that you can prove.  

Yet here you are, staring at a red banner while your coffee goes cold and your standup meeting starts without you.  

Turns out, AWS doesn’t just care what you do; it cares what you call it.  

Welcome to the quiet civil war between two IAM condition keys that look alike, sound alike, and yet refuse to share the same room: ResourceTag and RequestTag.  

The day my EC2 instance got grounded  

It happened on a Tuesday. Not because Tuesdays are cursed, but because Tuesdays are when everyone tries to get ahead before the week collapses into chaos.  

A developer on your team ran `aws ec2 run-instances` with all the right parameters and a hopeful heart. The response? A polite but firm refusal.  

The policy hadn’t changed. The role hadn’t changed. The only thing that had changed was the expectation that tagging was optional.  

In AWS, tags aren’t just metadata. They’re gatekeepers. And if your request doesn’t speak their language, the door stays shut.  

Meet the two Tag twins nobody told you about  

Think of aws:ResourceTag as the librarian who won’t let you check out a book unless it’s already labeled “Fiction” in neat, archival ink. It evaluates tags on existing resources. You’re not creating anything, you’re interacting with something that’s already there. Want to stop an EC2 instance? Fine, but only if it carries the tag `Environment = Production`. No tag? No dice.  

Now meet aws:RequestTag, the nightclub bouncer who won’t let you in unless you show up wearing a wristband that says “VIP,” and you brought the wristband yourself. This condition checks the tags you’re trying to apply when you create a new resource. It’s not about what exists. It’s about what you promise to bring into the world.  

One looks backward. The other looks forward. Confuse them, and your policy becomes a riddle with no answer.  

Why your policy is lying to you  

Here’s the uncomfortable truth: not all AWS services play nice with these conditions.  

Lambda? Mostly shrugs. S3? Cooperates, but only if you ask nicely (and include `s3:PutBucketTagging`). EC2? Oh, EC2 loves a good trap.  

When you run `ec2:RunInstances`, you’re not just creating an instance. You’re also (silently) creating volumes, network interfaces, and possibly a public IP. Each of those needs tagging permissions. And if your policy only allows `ec2:RunInstances` but forgets `ec2:CreateTags`? AccessDenied. Again.  

And don’t assume the AWS Console saves you. Clicking “Add tags” in the UI doesn’t magically bypass IAM. If your role lacks the right conditions, those tags vanish into the void before the resource is born.  

CloudTrail won’t judge you, but it will show you exactly which tags your request claimed to send. Sometimes, the truth hurts less than the guesswork.  

Building a Tag policy that doesn’t backfire  

Let’s build something that works in 2025, not 2018.  
Start with a simple rule: all new S3 buckets must carry `CostCenter` and `Owner`. Your policy might look like this:

{
  "Effect": "Allow",
  "Action": ["s3:CreateBucket", "s3:PutBucketTagging"],
  "Resource": "*",
  "Condition": {
    "StringEquals": {
      "aws:RequestTag/CostCenter": ["Marketing", "Engineering", "Finance"],
      "aws:RequestTag/Owner": ["*"]
    },
    "Null": {
      "aws:RequestTag/CostCenter": "false",
      "aws:RequestTag/Owner": "false"
    }
  }
}

Notice the `Null` condition. It’s the unsung hero that blocks requests missing the required tags entirely.  

For extra credit, layer this with AWS Organizations Service Control Policies (SCPs) to enforce tagging at the account level, and pair it with AWS Tag Policies (via Resource Groups) to standardize tag keys and values across your estate. Defense in depth isn’t paranoia, it’s peace of mind.  

Testing your policy without breaking production  

The IAM Policy Simulator is helpful, sure. But it won’t catch the subtle dance between `RunInstances` and `CreateTags`.  

Better approach: spin up a sandbox account. Write a Terraform module or a Python script that tries to create resources with and without tags. Watch what succeeds, what fails, and, most importantly, why.  

Automate these tests. Run them in CI. Treat IAM policies like code, because they are.  

Remember: in IAM, hope is not a strategy, but a good test plan is.  

The human side of tagging  

Tags aren’t for machines. Machines don’t care.  

Tags are for the human who inherits your account at 2 a.m. during an outage. For the finance team trying to allocate cloud spend. For the auditor who needs to prove compliance without summoning a séance.  

A well-designed tagging policy isn’t about control. It’s about kindness, to your future self, your teammates, and the poor soul who has to clean up after you.  

So next time you write a condition with `ResourceTag` or `RequestTag`, ask yourself: am I building a fence or a welcome mat?  

Because in the cloud, even silence speaks, if you’re listening to the tags.

Your Terraform S3 backend is confused not broken

You’ve done everything right. You wrote your Terraform config with the care of someone assembling IKEA furniture while mildly sleep-deprived. You double-checked your indentation (because yes, it matters). You even remembered to enable encryption, something your future self will thank you for while sipping margaritas on a beach far from production outages.

And then, just as you run terraform init, Terraform stares back at you like a cat that’s just been asked to fetch the newspaper.

Error: Failed to load state: NoSuchBucket: The specified bucket does not exist

But… you know the bucket exists. You saw it in the AWS console five minutes ago. You named it something sensible like company-terraform-states-prod. Or maybe you didn’t. Maybe you named it tf-bucket-please-dont-delete in a moment of vulnerability. Either way, it’s there.

So why is Terraform acting like you asked it to store your state in Narnia?

The truth is, Terraform’s S3 backend isn’t broken. It’s just spectacularly bad at telling you what’s wrong. It doesn’t throw tantrums, it just fails silently, or with error messages so vague they could double as fortune cookie advice.

Let’s decode its passive-aggressive signals together.

The backend block that pretends to listen

At the heart of remote state management lies the backend “s3” block. It looks innocent enough:

terraform {
  backend "s3" {
    bucket         = "my-team-terraform-state"
    key            = "networking/main.tfstate"
    region         = "us-west-2"
    dynamodb_table = "tf-lock-table"
    encrypt        = true
  }
}

Simple, right? But this block is like a toddler with a walkie-talkie: it only hears what it wants to hear. If one tiny detail is off, region, permissions, bucket name, it won’t say “Hey, your bucket is in Ohio but you told me it’s in Oregon.” It’ll just shrug and fail.

And because Terraform backends are loaded before variable interpolation, you can’t use variables inside this block. Yes, really. You’re stuck with hardcoded strings. It’s like being forced to write your grocery list in permanent marker.

The four ways Terraform quietly sabotages you

Over the years, I’ve learned that S3 backend errors almost always fall into one of four buckets (pun very much intended).

1. The credentials that vanished into thin air

Terraform needs AWS credentials. Not “kind of.” Not “maybe.” It needs them like a coffee machine needs beans. But it won’t tell you they’re missing, it’ll just say the bucket doesn’t exist, even if you’re looking at it in the console.

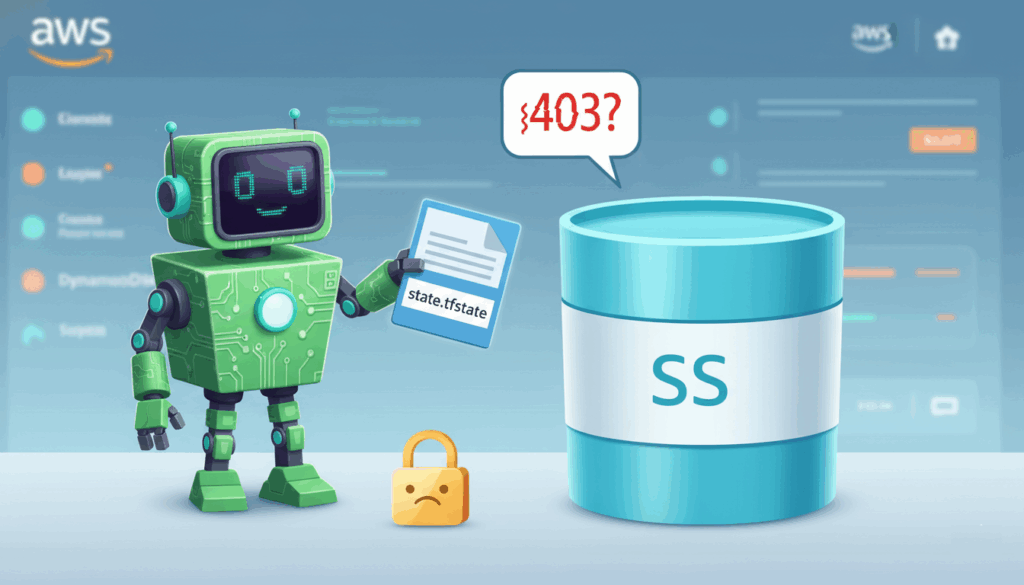
Why? Because without valid credentials, AWS returns a 403 Forbidden, and Terraform interprets that as “bucket not found” to avoid leaking information. Helpful for security. Infuriating for debugging.

Fix it: Make sure your credentials are loaded via environment variables, AWS CLI profile, or IAM roles if you’re on an EC2 instance. And no, copying your colleague’s .aws/credentials file while they’re on vacation doesn’t count as “secure.”

2. The region that lied to everyone

You created your bucket in eu-central-1. Your backend says us-east-1. Terraform tries to talk to the bucket in Virginia. The bucket, being in Frankfurt, doesn’t answer.

Result? Another “bucket not found” error. Because of course.

S3 buckets are region-locked, but the error message won’t mention regions. It assumes you already know. (Spoiler: you don’t.)

Fix it: Run this to check your bucket’s real region:

aws s3api get-bucket-location --bucket my-team-terraform-state

Then update your backend block accordingly. And maybe add a sticky note to your monitor: “Regions matter. Always.”

3. The lock table that forgot to show up

State locking with DynamoDB is one of Terraform’s best features; it stops two engineers from simultaneously destroying the same VPC like overeager toddlers with a piñata.

But if you declare a dynamodb_table in your backend and that table doesn’t exist? Terraform won’t create it for you. It’ll just fail with a cryptic message about “unable to acquire state lock.”

Fix it: Create the table manually (or with separate Terraform code). It only needs one attribute: LockID (string). And make sure your IAM user has dynamodb:GetItem, PutItem, and DeleteItem permissions on it.

Think of DynamoDB as the bouncer at a club: if it’s not there, anyone can stumble in and start redecorating.

4. The missing safety nets

Versioning and encryption aren’t strictly required, but skipping them is like driving without seatbelts because “nothing bad has happened yet.”

Without versioning, a bad terraform apply can overwrite your state forever. No undo. No recovery. Just you, your terminal, and the slow realization that you’ve deleted production.

Enable versioning:

aws s3api put-bucket-versioning \
  --bucket my-team-terraform-state \
  --versioning-configuration Status=Enabled

And always set encrypt = true. Your state file contains secrets, IDs, and the blueprint of your infrastructure. Treat it like your diary, not your shopping list.

Debugging without losing your mind

When things go sideways, don’t guess. Ask Terraform nicely for more details:

TF_LOG=DEBUG terraform init

Yes, it spits out a firehose of logs. But buried in there is the actual AWS API call, and the real error code. Look for lines containing AWS request or ErrorResponse. That’s where the truth hides.

Also, never run terraform init once and assume it’s locked in. If you change your backend config, you must run:

terraform init -reconfigure

Otherwise, Terraform will keep using the old settings cached in .terraform/. It’s stubborn like that.

A few quiet rules for peaceful coexistence

After enough late-night debugging sessions, I’ve adopted a few personal commandments:

  • One project, one bucket. Don’t mix dev and prod states in the same bucket. It’s like keeping your tax documents and grocery receipts in the same shoebox, technically possible, spiritually exhausting.
  • Name your state files clearly. Use paths like prod/web.tfstate instead of final-final-v3.tfstate.
  • Never commit backend configs with real bucket names to public repos. (Yes, people still do this. No, it’s not cute.)
  • Test your backend setup in a sandbox first. A $0.02 bucket and a tiny DynamoDB table can save you a $10,000 mistake.

It’s not you, it’s the docs

Terraform’s S3 backend works beautifully, once everything aligns. The problem isn’t the tool. It’s that the error messages assume you’re psychic, and the documentation reads like it was written by someone who’s never made a mistake in their life.

But now you know its tells. The fake “bucket not found.” The silent region betrayal. The locking table that ghosts you.

Next time it acts up, don’t panic. Pour a coffee, check your region, verify your credentials, and whisper gently: “I know you’re trying your best.”

Because honestly? It is.

The silent bill killers lurking in your Terraform state

The first time I heard the term “sustainability smell,” I rolled my eyes. It sounded like a fluffy marketing phrase dreamed up to make cloud infrastructure sound as wholesome as a farmers’ market. Eco-friendly Terraform? Right. Next, you’ll tell me my data center is powered by happy thoughts and unicorn tears.

But then it clicked. The term wasn’t about planting trees with every terraform apply. It was about that weird feeling you get when you open a legacy repository. It’s the code equivalent of opening a Tupperware container you found in the back of the fridge. You don’t know what’s inside, but you’re pretty sure it’s going to be unpleasant.

Turns out, I’d been smelling these things for years without knowing what to call them. According to HashiCorp’s 2024 survey, a staggering 70% of infrastructure teams admit to over-provisioning resources. It seems we’re all building mansions for guests who never arrive. That, my friend, is the smell. It’s the scent of money quietly burning in the background.

What exactly is that funny smell in my code

A “sustainability smell” isn’t a bug. It won’t trigger a PagerDuty alert at 3 AM. It’s far more insidious. It’s a bad habit baked into your Terraform configuration that silently drains your budget and makes future maintenance a soul-crushing exercise in digital archaeology.

The most common offender is the legendary main.tf file that looks more like an epic novel. You know the one. It’s a sprawling, thousand-line behemoth where VPCs, subnets, ECS clusters, IAM roles, and that one S3 bucket from a forgotten 2021 proof-of-concept all live together in chaotic harmony. Trying to change one small thing in that file is like playing Jenga with a live grenade. You pull out one block, and suddenly three unrelated services start weeping.

I’ve stumbled through enough of these digital haunted houses to recognize the usual ghosts:

  • The over-provisioned powerhouse: An RDS instance with enough horsepower to manage the entire New York Stock Exchange, currently tasked with serving a blog that gets about ten visits a month. Most of them are from the author’s mom.
  • The zombie load balancer: Left behind after a one-off traffic spike, it now spends its days blissfully idle, forwarding zero traffic but diligently charging your account for the privilege of existing.
  • Hardcoded horrors: Instance sizes and IP addresses sprinkled directly into the code like cheap confetti. Need to scale? Good luck. You’ll be hunting down those values for the rest of the week.
  • The phantom snapshot: That old EBS snapshot you swore you deleted. It’s still there, lurking in the dark corners of your AWS account, accumulating charges with the quiet persistence of a glacier.

The silent killers that sink your budget

Let’s be honest, no one’s idea of a perfect Friday afternoon involves becoming a private investigator whose only client is a rogue t3.2xlarge instance that went on a very expensive vacation without permission. It’s tempting to just ignore it. It’s just one instance, right?

Wrong. These smells are the termites of your cloud budget. You don’t notice them individually, but they are silently chewing through your financial foundations. That “tiny” overcharge joins forces with its zombie friends, and suddenly your bill isn’t just creeping up; it’s sprinting.

But the real horror is for the next person who inherits your repo. They were promised the Terraform dream: a predictable, elegant blueprint. Instead, they get a haunted house. Every terraform apply becomes a jump scare, a game of Russian roulette where they pray they don’t awaken some ancient, costly beast.

Becoming a cloud cost detective

So, how do you hunt these ghosts? While tools like Checkov, tfsec, and terrascan are your trusty guard dogs, they’ll bark if you leave the front door wide open; they won’t notice that you’re paying the mortgage on a ten-bedroom mansion when you only live in the garage. For that, you need to do some old-fashioned detective work.

My ghost-hunting toolkit is simple:

  1. Cross-Reference with reality: Check your declared instance sizes against their actual usage in CloudWatch. If your CPU utilization has been sitting at a Zen-like 2% for the past six months, you have a prime suspect.
  2. Befriend the terraform plan command: Run it often. Run it before you even think about changing code. Treat it like a paranoid glance over your shoulder. It’s your best defense against unintended consequences.
  3. Dig for treasure in AWS cost explorer: This is where the bodies are buried. Filter by service, by tag (you are tagging everything, right?), and look for the quiet, consistent charges. That weird $30 “other” charge that shows up every month? I’ve been ambushed by forgotten Route 53 hosted zones more times than I care to admit.

Your detective gadgets

Putting your budget directly into your code is a power move. It’s like putting a security guard inside the bank vault.

Here’s an aws_budgets_budget resource that will scream at you via SNS if you start spending too frivolously on your EC2 instances.

resource "aws_budgets_budget" "ec2_spending_cap" {
  name         = "budget-ec2-monthly-limit"
  budget_type  = "COST"
  limit_amount = "250.0"
  limit_unit   = "USD"
  time_unit    = "MONTHLY"

  cost_filters = {
    Service = ["Amazon Elastic Compute Cloud - Compute"]
  }

  notification {
    comparison_operator        = "GREATER_THAN"
    threshold                  = 80
    threshold_type             = "PERCENTAGE"
    notification_type          = "FORECASTED"
    subscriber_sns_topic_arns = [aws_sns_topic.budget_alerts.arn]
  }

  notification {
    comparison_operator        = "GREATER_THAN"
    threshold                  = 100
    threshold_type             = "PERCENTAGE"
    notification_type          = "ACTUAL"
    subscriber_sns_topic_arns = [aws_sns_topic.budget_alerts.arn]
  }
}

resource "aws_sns_topic" "budget_alerts" {
  name = "budget-alert-topic"
}

And for those phantom snapshots? Perform an exorcism with lifecycle rules. This little block of code tells S3 to act like a self-cleaning oven.

resource "aws_s3_bucket" "log_archive" {
  bucket = "my-app-log-archive-bucket"

  lifecycle_rule {
    id      = "log-retention-policy"
    enabled = true

    # Move older logs to a cheaper storage class
    transition {
      days          = 30
      storage_class = "STANDARD_IA"
    }

    # And then get rid of them entirely after a year
    expiration {
      days = 365
    }
  }
}

An exorcist’s guide to cleaner code

You can’t eliminate smells forever, but you can definitely keep them from taking over your house. There’s no magic spell, just a few simple rituals:

  1. Embrace modularity: Stop building monoliths. Break your infrastructure into smaller, logical modules. It’s the difference between remodeling one room and having to rebuild the entire house just to change a light fixture.
  2. Variables are your friends: Hardcoding an instance size is a crime against your future self. Use variables. It’s a tiny effort now that saves you a world of pain later.
  3. Tag everything. No, really: Tagging feels like a chore, but it’s a lifesaver. When you’re hunting for the source of a mysterious charge, a good tagging strategy is your map and compass. Tag by project, by team, by owner, heck, tag it with your favorite sandwich. Just tag it.
  4. Schedule a cleanup day: If it’s not on the calendar, it doesn’t exist. Dedicate a few hours every quarter to go ghost-hunting. Review idle resources, question oversized instances, and delete anything that looks dusty.

Your Terraform code is the blueprint for your infrastructure. And just like a real blueprint, any coffee stains, scribbled-out notes, or vague “we’ll figure this out later” sections get built directly into the final structure. If the plan calls for gold-plated plumbing in a closet that will never be used, that’s exactly what you’ll get. And you’ll pay for it. Every single month. These smells aren’t the spectacular, three-alarm fires that get everyone’s attention. They’re the slow, silent drips from a faucet in the basement. It’s just a dollar here for a phantom snapshot, five dollars there for an oversized instance. It’s nothing, right? But leave those drips unchecked long enough, and you don’t just get a high water bill. You come back to find you’ve cultivated a thriving mold colony and the floorboards are suspiciously soft. Ultimately, a clean repository isn’t just about being tidy. It’s about financial hygiene. So go on, open up that old repo. Be brave. The initial smell might be unpleasant, but it’s far better than the stench of a budget that has mysteriously evaporated into thin air.

Terraform scales better without a centralized remote state

It’s 4:53 PM on a Friday. You’re pushing a one-line change to an IAM policy. A change so trivial, so utterly benign, that you barely give it a second thought. You run terraform apply, lean back in your chair, and dream of the weekend. Then, your terminal returns a greeting from the abyss: Error acquiring state lock.

Somewhere across the office, or perhaps across the country, a teammate has just started a plan on their own, seemingly innocuous change. You are now locked in a digital standoff. The weekend is officially on hold. Your shared Terraform state file, once a symbol of collaboration and a single source of truth, has become a temperamental roommate who insists on using the kitchen right when you need to make dinner. And they’re a very, very slow cook.

Our Terraform honeymoon phase

It wasn’t always like this. Most of us start our Terraform journey in a state of blissful simplicity. Remember those early days? A single, elegant main.tf file, a tidy remote backend in an S3 bucket, and a DynamoDB table to handle the locking. It was the infrastructure equivalent of a brand-new, minimalist apartment. Everything had its place. Deployments were clean, predictable, and frankly, a little bit boring.

Our setup looked something like this, a testament to a simpler time:

# in main.tf
terraform {
  backend "s3" {
    bucket         = "our-glorious-infra-state-prod"
    key            = "global/terraform.tfstate"
    region         = "us-east-1"
    dynamodb_table = "terraform-state-lock-prod"
    encrypt        = true
  }
}

resource "aws_vpc" "main" {
  cidr_block = "10.0.0.0/16"
  # ... and so on
}

It worked beautifully. Until it didn’t. The problem with minimalist apartments is that they don’t stay that way. You add a person, then another. You buy more furniture. Soon, you’re tripping over things, and that one clean kitchen becomes a chaotic battlefield of conflicting needs.

The kitchen gets crowded

As our team and infrastructure grew, our once-pristine state file started to resemble a chaotic shared kitchen during rush hour. The initial design, meant for a single chef, was now buckling under the pressure of a full restaurant staff.

The state lock standoff

The first and most obvious symptom was the state lock. It’s less of a technical “race condition” and more of a passive-aggressive duel between two colleagues who both need the only good frying pan at the exact same time. The result? Burnt food, frayed nerves, and a CI/CD pipeline that spends most of its time waiting in line.

The mystery of the shared spice rack

With everyone working out of the same state file, we lost any sense of ownership. It became a communal spice rack where anyone could move, borrow, or spill things. You’d reach for the salt (a production security group) only to find someone had replaced it with sugar (a temporary rule for a dev environment). Every Terraform apply felt like a gamble. You weren’t just deploying your change; you were implicitly signing off on the current, often mysterious, state of the entire kitchen.

The pre-apply prayer

This led to a pervasive culture of fear. Before running an apply, engineers would perform a ritualistic dance of checks, double-checks, and frantic Slack messages: “Hey, is anyone else touching prod right now?” The Terraform plan output would scroll for pages, a cryptic epic poem of changes, 95% of which had nothing to do with you. You’d squint at the screen, whispering a little prayer to the DevOps gods that you wouldn’t accidentally tear down the customer database because of a subtle dependency you missed.

The domino effect of a single spilled drink

Worst of all was the tight coupling. Our infrastructure became a house of cards. A team modifying a network ACL for their new microservice could unintentionally sever connectivity for a legacy monolith nobody had touched in years. It was the architectural equivalent of trying to change a lightbulb and accidentally causing the entire building’s plumbing to back up.

An uncomfortable truth appears

For a while, we blamed Terraform. We complained about its limitations, its verbosity, and its sharp edges. But eventually, we had to face an uncomfortable truth: the tool wasn’t the problem. We were. Our devotion to the cult of the single centralized state—the idea that one file to rule them all was the pinnacle of infrastructure management—had turned our single source of truth into a single point of failure.

The great state breakup

The solution was as terrifying as it was liberating: we had to break up with our monolithic state. It was time to move out of the chaotic shared house and give every team their own well-equipped studio apartment.

Giving everyone their own kitchenette

First, we dismantled the monolith. We broke our single Terraform configuration into dozens of smaller, isolated stacks. Each stack managed a specific component or application, like a VPC, a Kubernetes cluster, or a single microservice’s infrastructure. Each had its own state file.

Our directory structure transformed from a single folder into a federation of independent projects:

infra/
├── networking/
│   ├── vpc.tf
│   └── backend.tf      # Manages its own state for the VPC
├── databases/
│   ├── rds-main.tf
│   └── backend.tf      # Manages its own state for the primary RDS
└── services/
    ├── billing-api/
    │   ├── ecs-service.tf
    │   └── backend.tf  # Manages state for just the billing API
    └── auth-service/
        ├── iam-roles.tf
        └── backend.tf  # Manages state for just the auth service

The state lock standoffs vanished overnight. Teams could work in parallel without tripping over each other. The blast radius of any change was now beautifully, reassuringly small.

Letting infrastructure live with its application

Next, we embraced GitOps patterns. Instead of a central infrastructure repository, we decided that infrastructure code should live with the application it supports. It just makes sense. The code for an API and the infrastructure it runs on are a tightly coupled couple; they should live in the same house. This meant code reviews for application features and infrastructure changes happened in the same pull request, by the same team.

Tasting the soup before serving it

Finally, we made surprises a thing of the past by validating plans before they ever reached the main branch. We set up simple CI workflows that would run a Terraform plan on every pull request. No more mystery meat deployments. The plan became a clear, concise contract of what was about to happen, reviewed and approved before merge.

A snippet from our GitHub Actions workflow looked like this:

name: 'Terraform Plan Validation'
on:
  pull_request:
    paths:
      - 'infra/**'
      - '.github/workflows/terraform-plan.yml'

jobs:
  plan:
    name: 'Terraform Plan'
    runs-on: ubuntu-latest
    steps:
    - name: Checkout
      uses: actions/checkout@v4

    - name: Setup Terraform
      uses: hashicorp/setup-terraform@v3
      with:
        terraform_version: 1.5.0

    - name: Terraform Init
      run: terraform init -backend=false

    - name: Terraform Plan
      run: terraform plan -no-color

Stories from the other side

This wasn’t just a theoretical exercise. A fintech firm we know split its monolithic repo into 47 micro-stacks. Their deployment speed shot up by 70%, not because they wrote code faster, but because they spent less time waiting and untangling conflicts. Another startup moved from a central Terraform setup to the AWS CDK (TypeScript), embedding infra in their app repos. They cut their time-to-deploy in half, freeing their SRE team from being gatekeepers and allowing them to become enablers.

Guardrails not gates

Terraform is still a phenomenally powerful tool. But the way we use it has to evolve. A centralized remote state, when not designed for scale, becomes a source of fragility, not strength. Just because you can put all your eggs in one basket doesn’t mean you should, especially when everyone on the team needs to carry that basket around.

The most scalable thing you can do is let teams build independently. Give them ownership, clear boundaries, and the tools to validate their work. Build guardrails to keep them safe, not gates to slow them down. Your Friday evenings will thank you for it.

When docker compose stopped being magic

There was a time, not so long ago, when docker-compose up felt like performing a magic trick. You’d scribble a few arcane incantations into a YAML file and, poof, your entire development stack would spring to life. The database, the cache, your API, the frontend… all humming along obediently on localhost. Docker Compose wasn’t just a tool; it was the trusty Swiss Army knife in every developer’s pocket, the reliable friend who always had your back.

Until it didn’t.

Our breakup wasn’t a single, dramatic event. It was a slow fade, the kind of awkward drifting apart that happens when one friend grows and the other… well, the other is perfectly happy staying exactly where they are. It began with small annoyances, then grew into full-blown arguments. We eventually realized we were spending more time trying to fix our relationship with YAML than actually building things.

So, with a heavy heart and a sigh of relief, we finally said goodbye.

The cracks begin to show

As our team and infrastructure matured, our reliable friend started showing some deeply annoying habits. The magic tricks became frustratingly predictable failures.

  • Our services started giving each other the silent treatment. The networking between containers became as fragile and unpredictable as a Wi-Fi connection on a cross-country train. One moment they were chatting happily, the next they wouldn’t be caught dead in the same virtual network.
  • It was worse at keeping secrets than a gossip columnist. The lack of native, secure secret handling was, to put it mildly, a joke. We were practically writing passwords on sticky notes and hoping for the best.
  • It developed a severe case of multiple personality disorder. The same docker-compose.yml file would behave like a well-mannered gentleman on one developer’s machine, a rebellious teenager in staging, and a complete, raving lunatic in production. Consistency was not its strong suit.
  • The phrase “It works on my machine” became a ritualistic chant. We’d repeat it, hoping to appease the demo gods, but they are a fickle bunch and rarely listened. We needed reliability, not superstition.

We had to face the truth. Our old friend just couldn’t keep up.

Moving on to greener pastures

The final straw was the realization that we had become full-time YAML therapists. It was time to stop fixing and start building again. We didn’t just dump Compose; we replaced it, piece by piece, with tools that were actually designed for the world we live in now.

For real infrastructure, we chose real code

For our production and staging environments, we needed a serious, long-term commitment. We found it in the AWS Cloud Development Kit (CDK). Instead of vaguely describing our needs in YAML and hoping for the best, we started declaring our infrastructure with the full power and grace of TypeScript.

We went from a hopeful plea like this:

# docker-compose.yml
services:
  api:
    build: .
    ports:
      - "8080:8080"
    depends_on:
      - database
  database:
    image: "postgres:14-alpine"

To a confident, explicit declaration like this:

// lib/api-stack.ts
import * as cdk from 'aws-cdk-lib';
import * as ecs from 'aws-cdk-lib/aws-ecs';
import * as ecs_patterns from 'aws-cdk-lib/aws-ecs-patterns';

// ... inside your Stack class
const vpc = /* your existing VPC */;
const cluster = new ecs.Cluster(this, 'ApiCluster', { vpc });

// Create a load-balanced Fargate service and make it public
new ecs_patterns.ApplicationLoadBalancedFargateService(this, 'ApiService', {
  cluster: cluster,
  cpu: 256,
  memoryLimitMiB: 512,
  desiredCount: 2, // Let's have some redundancy
  taskImageOptions: {
    image: ecs.ContainerImage.fromRegistry("your-org/your-awesome-api"),
    containerPort: 8080,
  },
  publicLoadBalancer: true,
});

It’s reusable, it’s testable, and it’s cloud-native by default. No more crossed fingers.

For local development, we found a better roommate

Onboarding new developers had become a nightmare of outdated README files and environment-specific quirks. For local development, we needed something that just worked, every time, on every machine. We found our perfect new roommate in Dev Containers.

Now, we ship a pre-configured development environment right inside the repository. A developer opens the project in VS Code, it spins up the container, and they’re ready to go.

Here’s the simple recipe in .devcontainer/devcontainer.json:

{
  "name": "Node.js & PostgreSQL",
  "dockerComposeFile": "docker-compose.yml", // Yes, we still use it here, but just for this!
  "service": "app",
  "workspaceFolder": "/workspace",

  // Forward the ports you need
  "forwardPorts": [3000, 5432],

  // Run commands after the container is created
  "postCreateCommand": "npm install",

  // Add VS Code extensions
  "extensions": [
    "dbaeumer.vscode-eslint",
    "esbenp.prettier-vscode"
  ]
}

It’s fast, it’s reproducible, and our onboarding docs have been reduced to: “1. Install Docker. 2. Open in VS Code.”

To speak every Cloud language, we hired a translator

As our ambitions grew, we needed to manage resources across different cloud providers without learning a new dialect for each one. Crossplane became our universal translator. It lets us manage our infrastructure, whether it’s on AWS, GCP, or Azure, using the language we already speak fluently: the Kubernetes API.

Want a managed database in AWS? You don’t write Terraform. You write a Kubernetes manifest.

# rds-instance.yaml
apiVersion: database.aws.upbound.io/v1beta1
kind: RDSInstance
metadata:
  name: my-production-db
spec:
  forProvider:
    region: eu-west-1
    instanceClass: db.t3.small
    masterUsername: admin
    allocatedStorage: 20
    engine: postgres
    engineVersion: "14.5"
    skipFinalSnapshot: true
    # Reference to a secret for the password
    masterPasswordSecretRef:
      namespace: crossplane-system
      name: my-db-password
      key: password
  providerConfigRef:
    name: aws-provider-config

It’s declarative, auditable, and fits perfectly into a GitOps workflow.

For the creative grind, we got a better workflow

The constant cycle of code, build, push, deploy, test, repeat for our microservices was soul-crushing. Docker Compose never did this well. We needed something that could keep up with our creative flow. Skaffold gave us the instant gratification we craved.

One command, skaffold dev, and suddenly we had:

  • Live code syncing to our development cluster.
  • Automatic container rebuilds and redeployments when files change.
  • A unified configuration for both development and production pipelines.

No more editing three different files and praying. Just code.

The slow fade was inevitable

Docker Compose was a fantastic tool for a simpler time. It was perfect when our team was small, our application was a monolith, and “production” was just a slightly more powerful laptop.

But the world of software development has moved on. We now live in an era of distributed systems, cloud-native architecture, and relentless automation. We didn’t just stop using Docker Compose. We outgrew it. And we replaced it with tools that weren’t just built for the present, but are ready for the future.

If your Kubernetes YAML looks Like hieroglyphics, this post is for you

It all started, as most tech disasters do, with a seductive whisper. “Just describe your infrastructure with YAML,” Kubernetes cooed. “It’ll be easy,” it said. And we, like fools in a love story, believed it.

At first, it was a beautiful romance. A few files, a handful of lines. It was elegant. It was declarative. It was… manageable. But entropy, the nosy neighbor of every DevOps team, had other plans. Our neat little garden of YAML files soon mutated into a sprawling, untamed jungle of configuration.

We had 12 microservices jostling for position, spread across 4 distinct environments, each with its own personality quirks and dark secrets. Before we knew it, we weren’t writing infrastructure anymore; we were co-authoring a Byzantine epic in a language seemingly designed by bureaucrats with a fetish for whitespace.

The question that broke the camel’s back

The day of reckoning didn’t arrive with a server explosion or a database crash. It came with a question. A question that landed in our team’s Slack channel with the subtlety of a dropped anvil, courtesy of a junior engineer who hadn’t yet learned to fear the YAML gods.

“Hey, why does our staging pod have a different CPU limit than prod?”

Silence. A deep, heavy, digital silence. The kind of silence that screams, “Nobody has a clue.”

What followed was an archaeological dig into the fossil record of our own repository. We unearthed layers of abstractions we had so cleverly built, peeling them back one by one. The trail led us through a hellish labyrinth:

  1. We started at deployment.yaml, the supposed source of all truth.
  2. That led us to values.yaml, the theoretical source of all truth.
  3. From there, we spelunked into values.staging.yaml, where truth began to feel… relative.
  4. We stumbled upon a dusty patch-cpu-emergency.yaml, a fossil from a long-forgotten crisis.
  5. Then we navigated the dark forest of custom/kustomize/base/deployment-overlay.yaml.
  6. And finally, we reached the Rosetta Stone of our chaos: an argocd-app-of-apps.yaml.

The revelation was as horrifying as finding a pineapple on a pizza: we had declared the same damn value six times, in three different formats, using two tools that secretly despised each other. We weren’t managing the configuration. We were performing a strange, elaborate ritual and hoping the servers would be pleased.

That’s when we knew. This wasn’t a configuration problem. It was an existential crisis. We were, without a doubt, deep in YAML Hell.

The tools that promised heaven and delivered purgatory

Let’s talk about the “friends” who were supposed to help. These tools promised to be our saviors, but without discipline, they just dug our hole deeper.

Helm, the chaotic magician

Helm is like a powerful but slightly drunk magician. When it works, it pulls a rabbit out of a hat. When it doesn’t, it sets the hat on fire, and the rabbit runs off with your wallet.

The Promise: Templating! Variables! A whole ecosystem of charts!

The Reality: Debugging becomes a form of self-torment that involves piping helm template into grep and praying. You end up with conditionals inside your templates that look like this:

image:
  repository: {{ .Values.image.repository | quote }}
  tag: {{ .Values.image.tag | default .Chart.AppVersion }}
  pullPolicy: {{ .Values.image.pullPolicy | default "IfNotPresent" }}

This looks innocent enough. But then someone forgets to pass image.tag for a specific environment, and you silently deploy :latest to production on a Friday afternoon. Beautiful.

Kustomize the master of patches

Kustomize is the “sensible” one. It’s built into kubectl. It promises clean, layered configurations. It’s like organizing your Tupperware drawer with labels.

The Promise: A clean base and tidy overlays for each environment.

The Reality: Your patch files quickly become a mystery box. You see this in your kustomization.yaml:

patchesStrategicMerge:
  - increase-replica-count.yaml
  - add-resource-limits.yaml
  - disable-service-monitor.yaml

Where are these files? What do they change? Why does disable-service-monitor.yaml only apply to the dev environment? Good luck, detective. You’ll need it.

ArgoCD, the all-seeing eye (that sometimes blinks)

GitOps is the dream. Your Git repo is the single source of truth. No more clicking around in a UI. ArgoCD or Flux will make it so.

The Promise: Declarative, automated sync from Git to cluster. Rollbacks are just a git revert away.

The Reality: If your Git repo is a dumpster fire of conflicting YAML, ArgoCD will happily, dutifully, and relentlessly sync that dumpster fire to production. It won’t stop you. One bad merge, and you’ve automated a catastrophe.

Our escape from YAML hell was a five-step sanity plan

We knew we couldn’t burn it all down. We had to tame the beast. So, we gathered the team, drew a line in the sand, and created five commandments for configuration sanity.

1. We built a sane repo structure

The first step was to stop the guesswork. We enforced a simple, predictable layout for every single service.

├── base/
│   ├── deployment.yaml
│   ├── service.yaml
│   └── configmap.yaml
└── overlays/
    ├── dev/
    │   ├── kustomization.yaml
    │   └── values.yaml
    ├── staging/
    │   ├── kustomization.yaml
    │   └── values.yaml
    └── prod/
        ├── kustomization.yaml
        └── values.yaml

This simple change eliminated 80% of the “wait, which file do I edit?” conversations.

2. One source of truth for values

This was a sacred vow. Each environment gets one values.yaml file. That’s it. We purged the heretics:

  • values-prod-final.v2.override.yaml
  • backup-of-values.yaml
  • donotdelete-temp-config.yaml

If a value wasn’t in the designated values.yaml for that environment, it didn’t exist. Period.

3. We stopped mixing Helm and Kustomize

You have to pick a side. We made a rule: if a service requires complex templating logic, use Helm. If it primarily needs simple overlays (like changing replica counts or image tags per environment), use Kustomize. Using both on the same service is like trying to write a sentence in two languages at once. It’s a recipe for suffering.

4. We render everything before deploying

Trust, but verify. We added a mandatory step in our CI pipeline to render the final YAML before it ever touches the cluster.

# For Helm + Kustomize setups
helm template . --values overlays/prod/values.yaml | \
kustomize build | \
kubeval -

This simple script does three magical things:

  • It validates that the output is syntactically correct YAML.
  • It lets us see exactly what is about to be applied.
  • It has completely eliminated the “well, that’s not what I expected” class of production incidents.

5. We built a simple config CLI

To make the right way the easy way, we built a small internal CLI tool. Now, instead of navigating the YAML jungle, an engineer simply runs:

$ ops-cli config generate --app=user-service --env=prod

This tool:

  1. Pulls the correct base templates and overlay values.
  2. Renders the final, glorious YAML.
  3. Validates it against our policies.
  4. Shows the developer a diff of what will change in the cluster.
  5. Saves lives and prevents hair loss.

YAML is now a tool again, not a trap.

The afterlife is peaceful

YAML didn’t ruin our lives. We did, by refusing to treat it with the respect it demands. Templating gives you incredible power, but with great power comes great responsibility… and redundancy, and confusion, and pull requests with 10,000 lines of whitespace changes. Now, we treat our YAML like we treat our application code. We lint it. We test it. We render it. And most importantly, we’ve built a system that makes it difficult to do the wrong thing. It’s the institutional equivalent of putting childproof locks on the kitchen cabinets. A determined toddler could probably still get to the cleaning supplies, but it would require a conscious, frustrating effort. Our system doesn’t make us smarter; it just makes our inevitable moments of human fallibility less catastrophic. It’s the guardrail on the scenic mountain road of configuration. You can still drive off the cliff, but you have to really mean it. Our infrastructure is no longer a hieroglyphic. It’s just… configuration. And the resulting boredom is a beautiful thing.

The core AWS services for modern DevOps

In any professional kitchen, there’s a natural tension. The chefs are driven to create new, exciting dishes, pushing the boundaries of flavor and presentation. Meanwhile, the kitchen manager is focused on consistency, safety, and efficiency, ensuring every plate that leaves the kitchen meets a rigorous standard. When these two functions don’t communicate well, the result is chaos. When they work in harmony, it’s a Michelin-star operation.

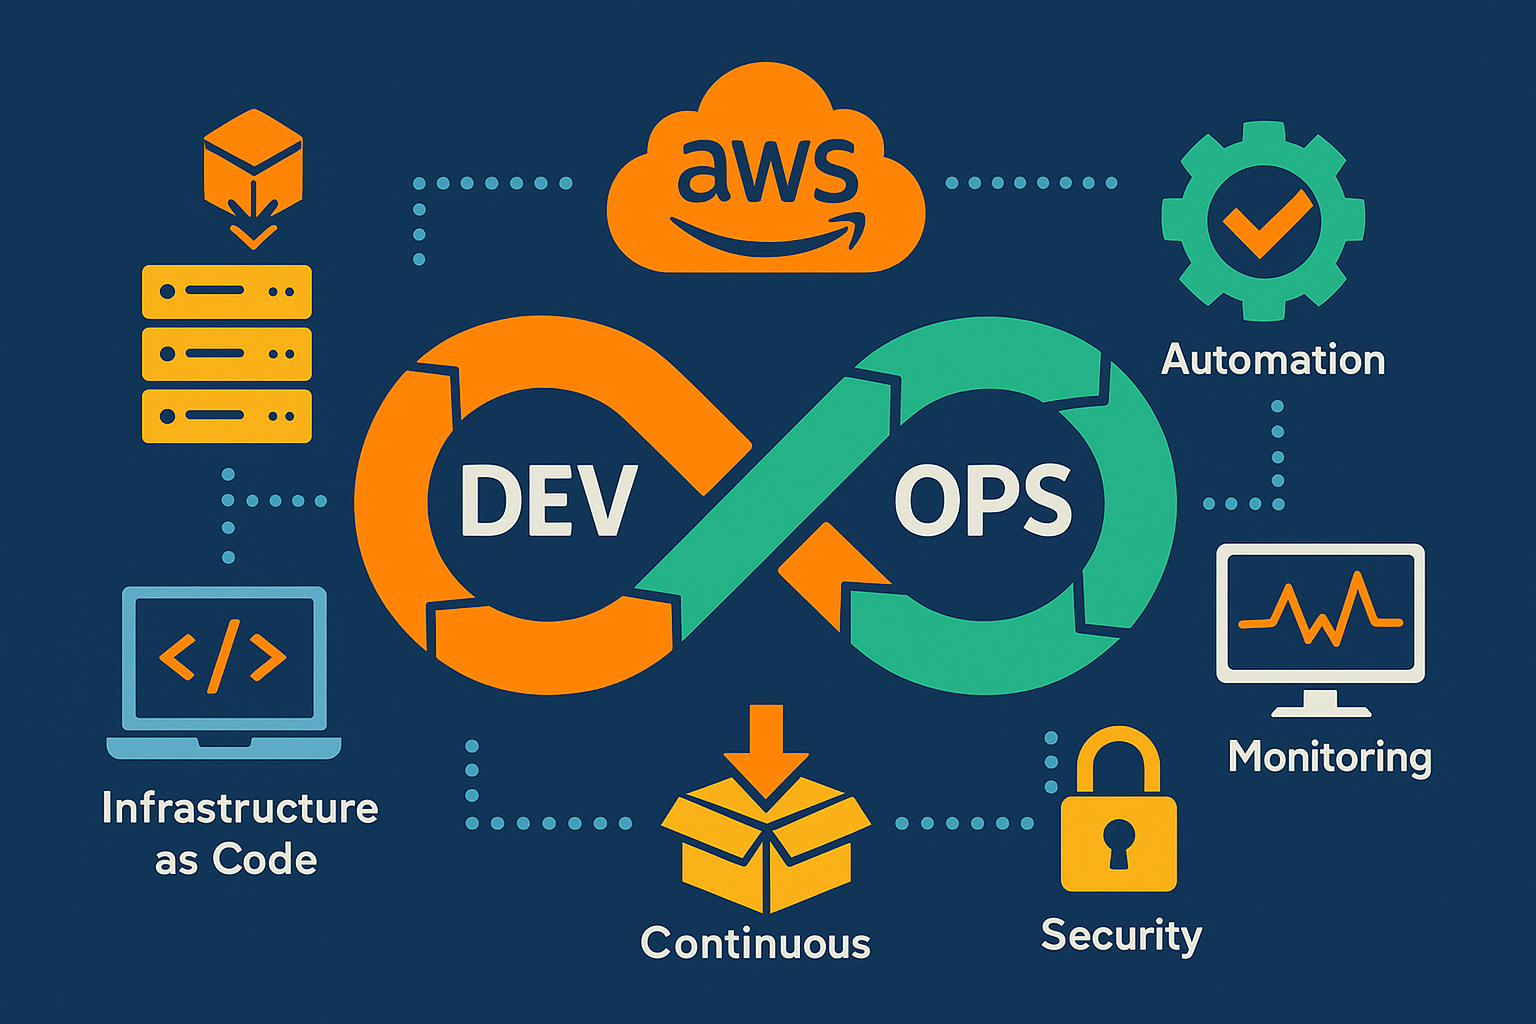
This is the world of software development. Developers are the chefs, driven by innovation. Operations teams are the managers, responsible for stability. DevOps isn’t just a buzzword; it’s the master plan that turns a chaotic kitchen into a model of culinary excellence. And AWS provides the state-of-the-art appliances and workflows to make it happen.

The blueprint for flawless construction

Building infrastructure without a plan is like a construction crew building a house from memory. Every house will be slightly different, and tiny mistakes can lead to major structural problems down the line. Infrastructure as Code (IaC) is the practice of using detailed architectural blueprints for every project.

AWS CloudFormation is your master blueprint. Using a simple text file (in JSON or YAML format), you define every single resource your application needs, from servers and databases to networking rules. This blueprint can be versioned, shared, and reused, guaranteeing that you build an identical, error-free environment every single time. If something goes wrong, you can simply roll back to a previous version of the blueprint, a feat impossible in traditional construction.

To complement this, the Amazon Machine Image (AMI) acts as a prefabricated module. Instead of building a server from scratch every time, an AMI is a perfect snapshot of a fully configured server, including the operating system, software, and settings. It’s like having a factory that produces identical, ready-to-use rooms for your house, cutting setup time from hours to minutes.

The automated assembly line for your code

In the past, deploying software felt like a high-stakes, manual event, full of risk and stress. Today, with a continuous delivery pipeline, it should feel as routine and reliable as a modern car factory’s assembly line.

AWS CodePipeline is the director of this assembly line. It automates the entire release process, from the moment code is written to the moment it’s delivered to the user. It defines the stages of build, test, and deploy, ensuring the product moves smoothly from one station to the next.

Before the assembly starts, you need a secure warehouse for your parts and designs. AWS CodeCommit provides this, offering a private and secure Git repository to store your code. It’s the vault where your intellectual property is kept safe and versioned.

Finally, AWS CodeDeploy is the precision robotic arm at the end of the line. It takes the finished software and places it onto your servers with zero downtime. It can perform sophisticated release strategies like Blue-Green deployments. Imagine the factory rolling out a new car model onto the showroom floor right next to the old one. Customers can see it and test it, and once it’s approved, a switch is flipped, and the new model seamlessly takes the old one’s place. This eliminates the risk of a “big bang” release.

Self-managing environments that thrive

The best systems are the ones that manage themselves. You don’t want to constantly adjust the thermostat in your house; you want it to maintain the perfect temperature on its own. AWS offers powerful tools to create these self-regulating environments.

AWS Elastic Beanstalk is like a “smart home” system for your application. You simply provide your code, and Beanstalk handles everything else automatically: deploying the code, balancing the load, scaling resources up or down based on traffic, and monitoring health. It’s the easiest way to get an application running in a robust environment without worrying about the underlying infrastructure.

For those who need more control, AWS OpsWorks is a configuration management service that uses Chef and Puppet. Think of it as designing a custom smart home system from modular components. It gives you granular control to automate how you configure and operate your applications and infrastructure, layer by layer.

Gaining full visibility of your operations

Operating an application without monitoring is like trying to run a factory from a windowless room. You have no idea if the machines are running efficiently if a part is about to break, or if there’s a security breach in progress.

AWS CloudWatch is your central control room. It provides a wall of monitors displaying real-time data for every part of your system. You can track performance metrics, collect logs, and set alarms that notify you the instant a problem arises. More importantly, you can automate actions based on these alarms, such as launching new servers when traffic spikes.

Complementing this is AWS CloudTrail, which acts as the unchangeable security logbook for your entire AWS account. It records every single action taken by any user or service, who logged in, what they accessed, and when. For security audits, troubleshooting, or compliance, this log is your definitive source of truth.

The unbreakable rules of engagement

Speed and automation are worthless without strong security. In a large company, not everyone gets a key to every room. Access is granted based on roles and responsibilities.

AWS Identity and Access Management (IAM) is your sophisticated keycard system for the cloud. It allows you to create users and groups and assign them precise permissions. You can define exactly who can access which AWS services and what they are allowed to do. This principle of “least privilege”, granting only the permissions necessary to perform a task, is the foundation of a secure cloud environment.

A cohesive workflow not just a toolbox

Ultimately, a successful DevOps culture isn’t about having the best individual tools. It’s about how those tools integrate into a seamless, efficient workflow. A world-class kitchen isn’t great because it has a sharp knife and a hot oven; it’s great because of the system that connects the flow of ingredients to the final dish on the table.

By leveraging these essential AWS services, you move beyond a simple collection of tools and adopt a new operational philosophy. This is where DevOps transcends theory and becomes a tangible reality: a fully integrated, automated, and secure platform. This empowers teams to spend less time on manual configuration and more time on innovation, building a more resilient and responsive organization that can deliver better software, faster and more reliably than ever before.