You know your computer, right? That trusty machine, maybe running Windows, macOS, or perhaps a flavor of Linux like my buddy Fernando rocks with his Ubuntu setup. It has an Operating System. Its job? To manage the guts of that one machine, the processor, the memory, the storage, making sure your apps can run, your files are saved. It’s the conductor of a small, personal orchestra.
Now… zoom out. Way out.
Imagine not one computer but thousands. Tens of thousands. Maybe millions. Housed in colossal buildings we call data centers, spread across the globe, all interconnected. A sprawling, humming galaxy of computation.
How do you manage that? You can’t just install Windows on the entire internet! That’s like trying to run a city using the rules of a single household. It just doesn’t scale.
Meet the Cloud Operating System.
Now, hold on, don’t picture a single piece of software called “CloudOS” that you download. It’s more fundamental, more… cosmic in its scope. Think of it less as the OS on a single server in the cloud (that’s often still Linux or Windows), and more like the overarching intelligence, the distributed brain managing the entire fleet, the whole data center, maybe even multiple data centers as one cohesive entity.
What does this cosmic brain do? It performs a symphony of coordination on a scale that would make your desktop OS blush:
It Abstracts the Hardware: It takes all those individual servers, storage racks, networking gear, the raw physical stuff, and throws a kind of “invisibility cloak” over it. It presents it all as a unified, seemingly infinite pool of resources. You ask for processing power, memory, storage, and the Cloud OS figures out where in that vast physical infrastructure to get it from, without you needing to know or care about the specific box. It’s like asking for “water” and the system handles whether it comes from this reservoir or that aquifer.
It Orchestrates Resources: Need to spin up a thousand virtual servers for a massive calculation? Boom. The Cloud OS handles the provisioning, allocation, and networking. Need to automatically scale your website’s capacity because you just went viral? The Cloud OS is the maestro making that happen seamlessly. It’s the ultimate traffic controller, resource allocator, and taskmaster for the entire digital city.
It Manages Virtualization: This is key. Cloud OSes are masters of virtualization, carving up physical machines into multiple virtual ones (VMs) or pooling resources to make many machines act as one giant one. It’s about turning rigid hardware into a flexible, fluid resource.
It Provides Essential Services: Think scheduling (what runs where and when), storage management (replicating data for safety, moving it for speed), network management (directing traffic flow), fault tolerance (if one server fails, the system barely notices), and massive automation (because no army of humans could manage this manually).
So, can you point to one specific “Cloud Operating System”? Well, it’s complicated. The giants, Amazon AWS, Microsoft Azure, and Google Cloud Platform, have built their own incredibly sophisticated, largely proprietary systems that act as the planet-scale operating systems for their clouds. Projects like OpenStack aim to provide an open-source framework to build this kind of cloud management system. And technologies like Kubernetes, while often called a “container orchestrator,” are essentially performing many of the distributed operating system functions at the application layer within the cloud.
Why is this disruptive? Because it fundamentally broke the old model of computing. We went from being limited by the box on our desk to tapping into near-limitless resources on demand. The Cloud OS is the unsung hero behind this revolution, the invisible intelligence weaving together the fabric of the modern digital world. It’s not just managing silicon and wires; it’s managing possibility on an unprecedented scale.
Think about that the next time you access a file from anywhere or watch a video streamed from the ether. You’re witnessing the silent, elegant dance orchestrated by a Cloud Operating System.
Hope that expands your view of the computational cosmos! Keep looking up… and into the cloud.
Containers have transformed how we build, deploy, and run software. We package our apps neatly into them, toss them onto Kubernetes, and sit back as things smoothly fall into place. But hidden beneath this simplicity is a critical component quietly doing all the heavy lifting, the container runtime. Let’s explain and clearly understand what this container runtime is, why it matters, and how it helps everything run seamlessly.
What exactly is a Container Runtime?
A container runtime is simply the software that takes your packaged application and makes it run. Think of it like the engine under the hood of your car; you rarely think about it, but without it, you’re not going anywhere. It manages tasks like starting containers, isolating them from each other, managing system resources such as CPU and memory, and handling important resources like storage and network connections. Thanks to runtimes, containers remain lightweight, portable, and predictable, regardless of where you run them.
Why should you care about Container Runtimes?
Container runtimes simplify what could otherwise become a messy job of managing isolated processes. Kubernetes heavily relies on these runtimes to guarantee the consistent behavior of applications every single time they’re deployed. Without runtimes, managing containers would be chaotic, like cooking without pots and pans, you’d end up with scattered ingredients everywhere, and things would quickly get messy.
Getting to know the popular Container Runtimes
Let’s explore some popular container runtimes that you’re likely to encounter:
Docker
Docker was the original popular runtime. It played a key role in popularizing containers, making them accessible to developers and enterprises alike. Docker provides an easy-to-use platform that allows applications to be packaged with all their dependencies into lightweight, portable containers.
One of Docker’s strengths is its extensive ecosystem, including Docker Hub, which offers a vast library of pre-built images. This makes it easy to find and deploy applications quickly. Additionally, Docker’s CLI and tooling simplify the development workflow, making container management straightforward even for those new to the technology.
However, as Kubernetes evolved, it moved away from relying directly on Docker. This was mainly because Docker was designed as a full-fledged container management platform rather than a lightweight runtime. Kubernetes required something leaner that focused purely on running containers efficiently without unnecessary overhead. While Docker still works well, most Kubernetes clusters now use containerd or CRI-O as their primary runtime for better performance and integration.
containerd
Containerd emerged from Docker as a lightweight, efficient, and highly optimized runtime that focuses solely on running containers. If Docker is like a full-service restaurant—handling everything from taking orders to cooking and serving, then containerd is just the kitchen. It does the cooking, and it does it well, but it leaves the extra fluff to other tools.
What makes containerd special? First, it’s built for speed and efficiency. It strips away the unnecessary components that Docker carries, focusing purely on running containers without the added baggage of a full container management suite. This means fewer moving parts, less resource consumption, and better performance in large-scale Kubernetes environments.
Containerd is now a graduated project under the Cloud Native Computing Foundation (CNCF), proving its reliability and widespread adoption. It’s the default runtime for many managed Kubernetes services, including Amazon EKS, Google GKE, and Microsoft AKS, largely because of its deep integration with Kubernetes through the Container Runtime Interface (CRI). This allows Kubernetes to communicate with containerd natively, eliminating extra layers and complexity.
Despite its strengths, containerd lacks some of the convenience features that Docker offers, like a built-in CLI for managing images and containers. Users often rely on tools like ctr or crictl to interact with it directly. But in a Kubernetes world, this isn’t a big deal, Kubernetes itself takes care of most of the higher-level container management.
With its low overhead, strong Kubernetes integration, and widespread industry support, containerd has become the go-to runtime for modern containerized workloads. If you’re running Kubernetes today, chances are containerd is quietly doing the heavy lifting in the background, ensuring your applications start up reliably and perform efficiently.
CRI-O
CRI-O is designed specifically to meet Kubernetes standards. It perfectly matches Kubernetes’ Container Runtime Interface (CRI) and focuses solely on running containers. If Kubernetes were a high-speed train, CRI-O would be the perfectly engineered rail system built just for it, streamlined, efficient, and without unnecessary distractions.
One of CRI-O’s biggest strengths is its tight integration with Kubernetes. It was built from the ground up to support Kubernetes workloads, avoiding the extra layers and overhead that come with general-purpose container platforms. Unlike Docker or even containerd, which have broader use cases, CRI-O is laser-focused on running Kubernetes workloads efficiently, with minimal resource consumption and a smaller attack surface.
Security is another area where CRI-O shines. Since it only implements the features Kubernetes needs, it reduces the risk of security vulnerabilities that might exist in larger, more feature-rich runtimes. CRI-O is also fully OCI-compliant, meaning it supports Open Container Initiative images and integrates well with other OCI tools.
However, CRI-O isn’t without its downsides. Because it’s so specialized, it lacks some of the broader ecosystem support and tooling that containerd and Docker enjoy. Its adoption is growing, but it’s not as widely used outside of Kubernetes environments, meaning you may not find as much community support compared to the more established runtimes. Despite these trade-offs, CRI-O remains a great choice for teams that want a lightweight, Kubernetes-native runtime that prioritizes efficiency, security, and streamlined performance.
Kata Containers
Kata Containers offers stronger isolation by running containers within lightweight virtual machines. It’s perfect for highly sensitive workloads, providing a security level closer to traditional virtual machines. But this added security comes at a cost, it typically uses more resources and can be slower than other runtimes. Consider Kata Containers as placing your app inside a secure vault, ideal when security is your top priority.
gVisor
Developed by Google, gVisor offers enhanced security by running containers within a user-space kernel. This approach provides isolation closer to virtual machines without requiring traditional virtualization. It’s excellent for workloads needing stronger isolation than standard containers but less overhead than full VMs. However, gVisor can introduce a noticeable performance penalty, especially for resource-intensive applications, because system calls must pass through its user-space kernel.
Kubernetes and the Container Runtime Interface
Kubernetes interacts with container runtimes using something called the Container Runtime Interface (CRI). Think of CRI as a universal translator, allowing Kubernetes to clearly communicate with any runtime. Kubernetes sends instructions, like launching or stopping containers, through CRI. This simple interface lets Kubernetes remain flexible, easily switching runtimes based on your needs without fuss.
Choosing the right Runtime for your needs
Selecting the best runtime depends on your priorities:
Efficiency – Does it maximize system performance?
Complexity: Does it avoid adding unnecessary complications?
Security: Does it provide the isolation level your applications demand?
If security is crucial, like handling sensitive financial or medical data, you might prefer runtimes like Kata Containers or gVisor, specifically designed for stronger isolation.
Final thoughts
Container runtimes might not grab headlines, but they’re crucial. They quietly handle the heavy lifting, making sure your containers run smoothly, securely, and efficiently. Even though they’re easy to overlook, runtimes are like the backstage crew of a theater production, diligently working behind the curtains. Without them, even the simplest container deployment would quickly turn into chaos, causing applications to crash, misbehave, or even compromise security. Every time you launch an application effortlessly onto Kubernetes, it’s because the container runtime is silently solving complex problems for you. So, the next time your containers spin up flawlessly, take a moment to appreciate these hidden champions, they might not get applause, but they truly deserve it.
Your application needs to be fast. Fast. That’s where ElastiCache comes in, it’s like a super-charged, in-memory storage system, often powered by Memcached, that sits between your application and your database. Think of it as a readily accessible pantry with your most frequently used data. Instead of constantly going to the main database (a much slower trip), your application can grab what it needs from ElastiCache, making everything lightning-quick. Memcached, in particular, acts like a giant, incredibly efficient key-value store, a place to jot down important notes for your application to access instantly.
But what happens when this pantry gets too full? Things start getting tossed out. That’s an eviction. In the world of ElastiCache, evictions aren’t just a minor inconvenience; they can significantly slow down your application, leading to longer wait times for your users. Nobody wants that.
This article explores why these evictions occur and, more importantly, how to keep your ElastiCache running smoothly, ensuring your application stays responsive and your users happy.
Why is my ElastiCache fridge throwing things out?
There are a few usual suspects when it comes to evictions. Let’s take a look:
The fridge is too small (Insufficient Memory): This is the most common culprit. Memcached, the engine often used in ElastiCache, works with a fixed amount of memory. You tell it, “You get this much space and no more!” When you try to cram too many ingredients in, it has to start throwing out the older or less frequently used stuff to make room. It’s like having a tiny fridge for a big family, it’s just not going to work long-term.
Too much coming and going (High Cache Churn): Imagine you’re constantly swapping out ingredients in your fridge. You put in fresh tomatoes, then decide you need lettuce, then back to tomatoes, then onions… You’re creating a lot of activity! This “churn” can lead to evictions, even if the fridge isn’t full, because Memcached is constantly trying to keep up with the changes.
Giant watermelons (Large Item Sizes): Trying to store a whole watermelon in a small fridge? Good luck! Similarly, if you’re caching huge chunks of data (like massive images or videos), you’ll fill up your ElastiCache memory very quickly.
Expired milk (Expired Items): Even expired items take up space. While Memcached should eventually remove expired items (things with an expiration date, or TTL – Time To Live), if you have a lot of expired items piling up, they can contribute to the problem.
How do I know when evictions are happening?
You need a way to peek inside the fridge without opening the door every five seconds. That’s where AWS CloudWatch comes in. It’s like having a little dashboard that shows you what’s going on inside your ElastiCache. Here are the key things to watch:
Evictions (The Big One): This is the most direct measurement. It tells you, plain and simple, how many items have been kicked out of the cache. A high number here is a red flag.
BytesUsedForCache: This shows you how much of your fridge’s total capacity is currently being used. If this is consistently close to your maximum, you’re living dangerously close to eviction territory.
CurrItems: This is the number of sticky notes (items) currently in your cache. A sudden drop in CurrItems along with a spike in Evictions is a very strong indicator that things are being thrown out.
The stats Command (For the Curious): If you’re using Memcached, you can connect to your ElastiCache instance and run the stats command. This gives you a ton of information, including details about evictions, memory usage, and more. It’s like looking at the fridge’s internal diagnostic report.
Run this command to see memory usage, evictions, and more:
echo "stats" | nc <your-cache-endpoint> 11211
It’s like checking your fridge’s inventory list to see what’s still inside.
Okay, I’m getting evictions. What do I do?
Don’t panic! There are several ways to get things back under control:
Get a bigger fridge (Scaling Your Cluster):
Vertical Scaling: This means getting a bigger node (a single server in your ElastiCache cluster). Think of it like upgrading from a mini-fridge to a full-size refrigerator. This is good if you consistently need more memory.
Horizontal Scaling: This means adding more nodes to your cluster. Think of it like having multiple smaller fridges instead of one giant one. This is good if you have fluctuating demand or need to spread the load across multiple servers.
Be smarter about what you put in the fridge (Optimizing Cache Usage):
TTL tuning: TTL (Time To Live) is like the expiration date on your food. Don’t store things longer than you need to. A shorter TTL means items get removed more frequently, freeing up space. But don’t make it too short, or you’ll be running to the market (database) too often! It’s a balancing act.
Smaller portions (Reducing Item Size): Can you break down those giant watermelons into smaller, more manageable pieces? Can you compress your data before storing it? Smaller items mean more space.
Eviction policy (LRU, LFU, etc.): Memcached usually uses an LRU (Least Recently Used) policy, meaning it throws out the items that haven’t been accessed in the longest time. There are other policies (like LFU – Least Frequently Used), but LRU is usually a good default. Understanding how your eviction policy works can help you predict and manage evictions.
How do I avoid this mess in the future?
The best way to deal with evictions is to prevent them in the first place.
Plan ahead (Capacity Planning): Think about how much data you’ll need to store in the future. Don’t just guess – try to make an educated estimate based on your application’s growth.
Keep an eye on things (Continuous Monitoring): Don’t just set up CloudWatch and forget about it! Regularly check your metrics. Look for trends. Are evictions slowly increasing over time? Is your memory usage creeping up?
Let the robots handle It (Automated Scaling): ElastiCache offers Auto Scaling, which can automatically adjust the size of your cluster based on demand. It’s like having a fridge that magically expands and contracts as needed! This is a great way to handle unpredictable workloads.
The bottom line
ElastiCache evictions are a sign that your cache is under pressure. By understanding the causes, monitoring the right metrics, and taking proactive steps, you can keep your “fridge” running smoothly and your application performing at its best. It’s all about finding the right balance between speed, efficiency, and resource usage. Think like a chef, plan your menu, manage your ingredients, and keep your kitchen running like a well-oiled machine 🙂
There’s a hidden art to placing your EC2 instances in AWS. It’s not just about spinning up machines and hoping for the best, where they land in AWS’s vast infrastructure can make all the difference in performance, resilience, and cost. This is where Placement Groups come in.
You might have deployed instances before without worrying about placement, and for many workloads, that’s perfectly fine. But when your application needs lightning-fast communication, fault tolerance, or optimized performance, Placement Groups become a critical tool in your AWS arsenal.
Let’s break it down.
What are Placement Groups?
AWS Placement Groups give you control over how your EC2 instances are positioned within AWS’s data centers. Instead of leaving it to chance, you can specify how close, or how far apart, your instances should be placed. This helps optimize either latency, fault tolerance, or a balance of both.
There are three types of Placement Groups: Cluster, Spread, and Partition. Each serves a different purpose, and choosing the right one depends on your application’s needs.
Types of Placement Groups and when to use them
Cluster Placement Groups for speed over everything
Think of Cluster Placement Groups like a Formula 1 pit crew. Every millisecond counts, and your instances need to communicate at breakneck speeds. AWS achieves this by placing them on the same physical hardware, minimizing latency, and maximizing network throughput.
This is perfect for: ✅ High-performance computing (HPC) clusters ✅ Real-time financial trading systems ✅ Large-scale data processing (big data, AI, and ML workloads)
⚠️ The Trade-off: While these instances talk to each other at lightning speed, they’re all packed together on the same hardware. If that hardware fails, everything inside the Cluster Placement Group goes down with it.
Spread Placement Groups for maximum resilience
Now, imagine you’re managing a set of VIP guests at a high-profile event. Instead of seating them all at the same table (risking one bad spill ruining their night), you spread them out across different areas. That’s what Spread Placement Groups do, they distribute instances across separate physical machines to reduce the impact of hardware failure.
Best suited for: ✅ Mission-critical applications that need high availability ✅ Databases requiring redundancy across multiple nodes ✅ Low-latency, fault-tolerant applications
⚠️ The Limitation: AWS allows only seven instances per Availability Zone in a Spread Placement Group. If your application needs more, you may need to rethink your architecture.
Partition Placement Groups, the best of both worlds approach
Partition Placement Groups work like a warehouse with multiple sections, each with its power supply. If one section loses power, the others keep running. AWS follows the same principle, grouping instances into multiple partitions spread across different racks of hardware. This provides both high performance and resilience, a sweet spot between Cluster and Spread Placement Groups.
Best for: ✅ Distributed databases like Cassandra, HDFS, or Hadoop ✅ Large-scale analytics workloads ✅ Applications needing both performance and fault tolerance
⚠️ AWS’s Partitioning Rule: The number of partitions you can use depends on the AWS Region, and you must carefully plan how instances are distributed.
How to Configure Placement Groups
Setting up a Placement Group is straightforward, and you can do it using the AWS Management Console, AWS CLI, or an SDK.
🚀 Combine with Multi-AZ Deployments: Placement Groups work within a single Availability Zone, so consider spanning multiple AZs for maximum resilience.
📊 Monitor Network Performance: AWS doesn’t guarantee placement if your instance type isn’t supported or there’s insufficient capacity. Always benchmark your performance after deployment.
💰 Balance Cost and Performance: Cluster Placement Groups give the fastest network speeds, but they also increase failure risk. If high availability is critical, Spread or Partition Groups might be a better fit.
Final thoughts
AWS Placement Groups are a powerful but often overlooked feature. They allow you to maximize performance, minimize downtime, and optimize costs, but only if you choose the right type.
The next time you deploy EC2 instances, don’t just launch them randomly, placement matters. Choose wisely, and your infrastructure will thank you for it.
The cloud is a dream come true for businesses. Agility, scalability, global reach, it’s all there. But, jumping into the cloud without a solid foundation is like setting up a city without roads, plumbing, or electricity. Sure, you can start building skyscrapers, but soon enough, you’ll be dealing with chaos, no clear way to manage access, tangled networking, security loopholes, and spiraling costs.
That’s where Landing Zones come in. They provide the blueprint, the infrastructure, and the guardrails so you can grow your cloud environment in a structured, scalable, and secure way. Let’s break it down.
What is a Landing Zone?
Think of a Landing Zone as the cloud’s equivalent of a well-planned neighborhood. Instead of letting houses pop up wherever they fit, you lay down roads, set up electricity, define zoning rules, and ensure there’s proper security. This way, when new residents move in, they have everything they need from day one.
In technical terms, a Landing Zone is a pre-configured cloud environment that enforces best practices, security policies, and automation from the start. You’re not reinventing the wheel every time you deploy a new application; instead, you’re working within a structured, repeatable framework.
Key components of any Landing Zone:
Identity and Access Management (IAM): Who has the keys to which doors?
Networking: The plumbing and wiring of your cloud city.
Security: Built-in alarms, surveillance, and firewalls.
Compliance: Ensuring regulations like GDPR or HIPAA are followed.
Automation: Infrastructure as Code (IaC) sets up resources predictably.
Governance: Rules that ensure consistency and control.
Why do you need a Landing Zone?
Why not just create cloud resources manually as you go? That’s like building a house without a blueprint, you’ll get something up, but sooner or later, it will collapse under its complexity.
Landing Zones save you from future headaches:
Faster Cloud Adoption: Everything is pre-configured, so teams can deploy applications quickly.
Stronger Security: Policies and guardrails are in place from day one, reducing risks.
Cost Efficiency: Prevents the dreaded “cloud sprawl” where resources are created haphazardly, leading to uncontrolled expenses.
Focus on Innovation: Teams spend less time on setup and more time on building.
Scalability: A well-structured cloud environment grows effortlessly with your needs.
It’s the difference between a well-organized toolbox and a chaotic mess of scattered tools. Which one lets you work faster and with fewer mistakes?
Different types of Landing Zones
Not all businesses need the same kind of cloud setup. The structure of your Landing Zone depends on your workloads and goals.
Cloud-Native: Designed for applications built specifically for the cloud.
Lift-and-Shift: Migrating legacy applications without significant changes.
Containerized: Optimized for Kubernetes and Docker-based workloads.
Data Science & AI/ML: Tailored for heavy computational and analytical tasks.
Hybrid Cloud: Bridging on-premises infrastructure with cloud resources.
Multicloud: Managing workloads across multiple cloud providers.
Each approach serves a different need, just like different types of buildings, offices, factories, and homes, serve different purposes in a city.
Landing Zones in AWS
AWS provides tools to make Landing Zones easier to implement, whether you’re a beginner or an advanced cloud architect.
Key AWS services for Landing Zones:
AWS Organizations: Manages multiple AWS accounts under a unified structure.
AWS Control Tower: Automates Landing Zone set up with best practices.
IAM, VPC, CloudTrail, Config, Security Hub, Service Catalog, CloudFormation: The building blocks that shape your environment.
Two ways to set up a Landing Zone in AWS:
AWS Control Tower (Recommended) – Provides an automated, guided setup with guardrails and best practices.
Custom-built Landing Zone – Built manually using CloudFormation or Terraform, offering more flexibility but requiring expertise.
Basic setup with Control Tower:
Plan your cloud structure.
Set up AWS Organizations to manage accounts.
Deploy Control Tower to automate governance and security.
Customize it to match your specific needs.
A well-structured AWS Landing Zone ensures that accounts are properly managed, security policies are enforced, and networking is set up for future growth.
Scaling and managing your Landing Zone
Setting up a Landing Zone is not a one-time task. It’s a continuous process that evolves as your cloud environment grows.
Best practices for ongoing management:
Automate Everything: Use Infrastructure as Code (IaC) to maintain consistency.
Monitor Continuously: Use AWS CloudWatch and AWS Config to track changes.
Manage Costs Proactively: Keep cloud expenses under control with AWS Budgets and Cost Explorer.
Stay Up to Date: Cloud best practices evolve, and so should your Landing Zone.
Think of your Landing Zone like a self-driving car. You might have set it up with the best configuration, but if you never update the software or adjust its sensors, you’ll eventually run into problems.
Summarizing
A strong Landing Zone isn’t just a technical necessity, it’s a strategic advantage. It ensures that your cloud journey is smooth, secure, and cost-effective.
Many businesses rush into the cloud without a plan, only to find themselves overwhelmed by complexity and security risks. Don’t be one of them. A well-architected Landing Zone is the difference between a cloud environment that thrives and one that turns into a tangled mess of unmanaged resources.
Set up your Landing Zone right, and you won’t just land in the cloud, you’ll be ready to take off.
Imagine a team of data scientists, huddled together, eyes glued to their screens. They’ve just cracked the code, a revolutionary machine-learning model that accurately predicts customer churn. Champagne corks pop, high-fives are exchanged, and visions of promotions dance in their heads. But their celebration is short-lived.
They hit a wall as they attempt to deploy this marvel into the real world. It’s like having a Ferrari engine in a horse-drawn carriage, the power is there, but the infrastructure can’t handle it. This, my friend, is the challenge of scaling machine learning operations. It’s a story of triumphs and tribulations, of brilliant minds and frustrating bottlenecks, of soaring ambitions and the harsh realities of implementation.
The bottlenecks, a comedy of errors
First, our heroes encounter the “Model Management Maze.” Models are scattered across various computers, servers, and cloud platforms like books in a disorganized library. No one knows which version is the latest, leading to confusion, duplicated efforts, and a few near disasters. Without centralized versioning, it’s a recipe for chaos.
Next, they stumble into the “Deployment Danger Zone.” Moving a model from the lab to production is like navigating a minefield. Handoffs between data scientists and IT teams often lead to performance degradation at scale. Suddenly, maintaining model efficiency feels like juggling chainsaws while blindfolded.
And then there’s the “Skills Gap Swamp.” Finding qualified machine learning engineers is like searching for a needle in a haystack. Even if you find them, retaining them is an entirely different challenge. The demand for talent is fierce, and companies are fighting tooth and nail for top-tier engineers.
Finally, our heroes face the “Tool Tango.” They’re bombarded with an overwhelming array of platforms, frameworks, and tools, each with its quirks and complexities. Integrating them feels like trying to fit square pegs into round holes. It’s a frustrating dance, a tango of confusion, incompatibility, and frustration.
The solutions, a symphony of collaboration
But fear not, for there is hope. Companies that have successfully scaled their machine-learning operations have uncovered some key strategies:
The unified platform orchestra
Imagine a conductor leading a symphony orchestra, each instrument playing in perfect harmony. A unified platform, such as Kubeflow or MLflow, brings together model management, deployment, and monitoring into a single, cohesive system. Gone are the days of scattered models and deployment nightmares. With all the tools harmonized under one roof, teams can focus on innovation rather than integration.
The cross-functional team chorus
Scaling machine learning is not a solo act; it’s a chorus of different voices. Data scientists, IT engineers, and business leaders must collaborate closely, each contributing their expertise. This cross-functional team setup ensures that all stages of the machine learning lifecycle, training, deployment, and monitoring, are handled seamlessly, turning a chaotic process into a well-rehearsed performance.
The performance optimization ballet
Maintaining model performance at scale is a delicate dance, one that requires continuous monitoring and optimization. This is where observability becomes critical. Tools like Prometheus and Grafana, paired with application monitoring frameworks, allow teams to track model performance and system metrics in real-time. It’s not just about detecting errors or exceptions but also about understanding subtle shifts in data patterns that could affect model accuracy. It’s a ballet of precision, requiring constant tuning and adjustments.
Learning from the masters
Companies like CVS Health and Nielsen have demonstrated the power of these approaches. CVS Health streamlined its operations by fully integrating data science and IT teams, ensuring a unified effort across the board. Nielsen achieved remarkable efficiency by adopting a cloud-based platform, automating many stages of the machine learning lifecycle. Both companies showed that by focusing on collaboration and using the right tools, machine learning at scale is not only possible but transformative.
A focus on Observability and Monitoring
One key aspect of successfully scaling machine learning operations that deserves particular attention is observability. Monitoring is not just about ensuring that the system runs without errors, it’s about gathering rich insights from logs, metrics, and traces that help teams proactively maintain performance. This is especially crucial as models can drift over time, producing less accurate predictions as new data comes in.
By setting up proper observability frameworks, companies can detect issues like model drift, latency, and bottlenecks in data pipelines. Leveraging tools like OpenTelemetry or Azure Monitor, teams can not only track model performance but also improve the long-term reliability of their machine learning systems. Observability ensures that the whole operation remains resilient and adaptable as the business grows.
The road ahead
The journey to scale machine learning operations is not for the faint of heart. It’s a challenging, yet rewarding adventure, filled with obstacles and opportunities. With careful planning, the right tools, and a collaborative spirit, companies can unlock the true potential of machine learning and transform their businesses in ways previously unimaginable. And while the path may be fraught with challenges, those who master this symphony of processes will be well-prepared to lead in the AI-driven world of tomorrow.
In the early days of software development, most applications were built using a monolithic architecture. This model, while reliable for small-scale systems, often struggled as applications grew in complexity and user demand. Over time, companies like Amazon found themselves facing significant operational challenges under the weight of their monolithic systems, leading to an evolution in software design, the shift from monoliths to microservices.
This article delves into the reasoning behind this transition and explores why many organizations today are adopting microservices for better agility, scalability, and innovation.
Understanding the Monolithic Architecture
A monolithic application is essentially a single, unified software structure. All the components, whether they are related to the user interface, business logic, or database operations. are bundled into one large codebase. Traditionally, this approach was the most common and familiar to software engineers. It was simple to design, test, and deploy, which made it ideal for smaller applications with minimal complexity.
However, as applications grew in size and scope, the limitations of monolithic systems became apparent. Let’s take a look at an example from Amazon’s history.
Amazon’s Monolithic Beginnings
In the 1990s, Amazon’s bookstore application was built on a monolithic architecture, consisting of a simple web server front end and a database back end. While this model served them well initially, the sheer growth of their business created bottlenecks that couldn’t be easily addressed. With every new feature, the complexity of their system increased, making it harder to release updates without affecting other parts of the application.
Here’s where monoliths begin to struggle:
Coordination Complexity: Developers working on different features had to coordinate with one another constantly. If a team wanted to add a new feature or change a database table, they needed to check with every other team that relied on that feature or table. This led to high communication overhead and slowed down innovation.
Scaling Issues: Scaling a monolithic system often means scaling the entire application, even if only one part of it is experiencing high demand. This is both inefficient and expensive.
Deployment Risk: Since every part of the application is tightly coupled, releasing even a minor update could introduce bugs or break functionality elsewhere. The risks associated with deploying changes were high, leading to a slower pace of delivery.
The Shift Toward Microservices. A Solution for Scale and Agility
By the late 1990s, Amazon realized they needed a new approach to continue scaling their business and innovating at a competitive pace. They introduced the “Distributed Computing Manifesto,” a blueprint for shifting away from the monolithic model toward a more flexible and scalable architecture, microservices.
What are Microservices?
Microservices break down a monolithic application into smaller, independent services, each responsible for a specific piece of functionality. These services communicate through well-defined APIs, allowing them to work together while remaining decoupled from one another.
The core principles that drove Amazon’s transition from monolith to microservices were:
Small, Independent Services: The smaller each service, the more manageable it becomes. Teams working on different services can make changes and deploy them independently without affecting the entire system.
Decoupling Based on Scaling Factors: Instead of decoupling the application based on functions (e.g., web servers vs. database servers), Amazon focused on decoupling based on what parts of the system were impeding agility and speed. This allows for more targeted scaling of only the components that require it.
Independent Operation: Each service operates as its entity. This reduces cross-team coordination, as each service can be developed, tested, and deployed on its own schedule.
APIs Between Services: Communication between services is done through APIs, which ensures that the system remains loosely coupled. Services don’t need to share databases or be aware of each other’s internal workings, which promotes modularity and flexibility.
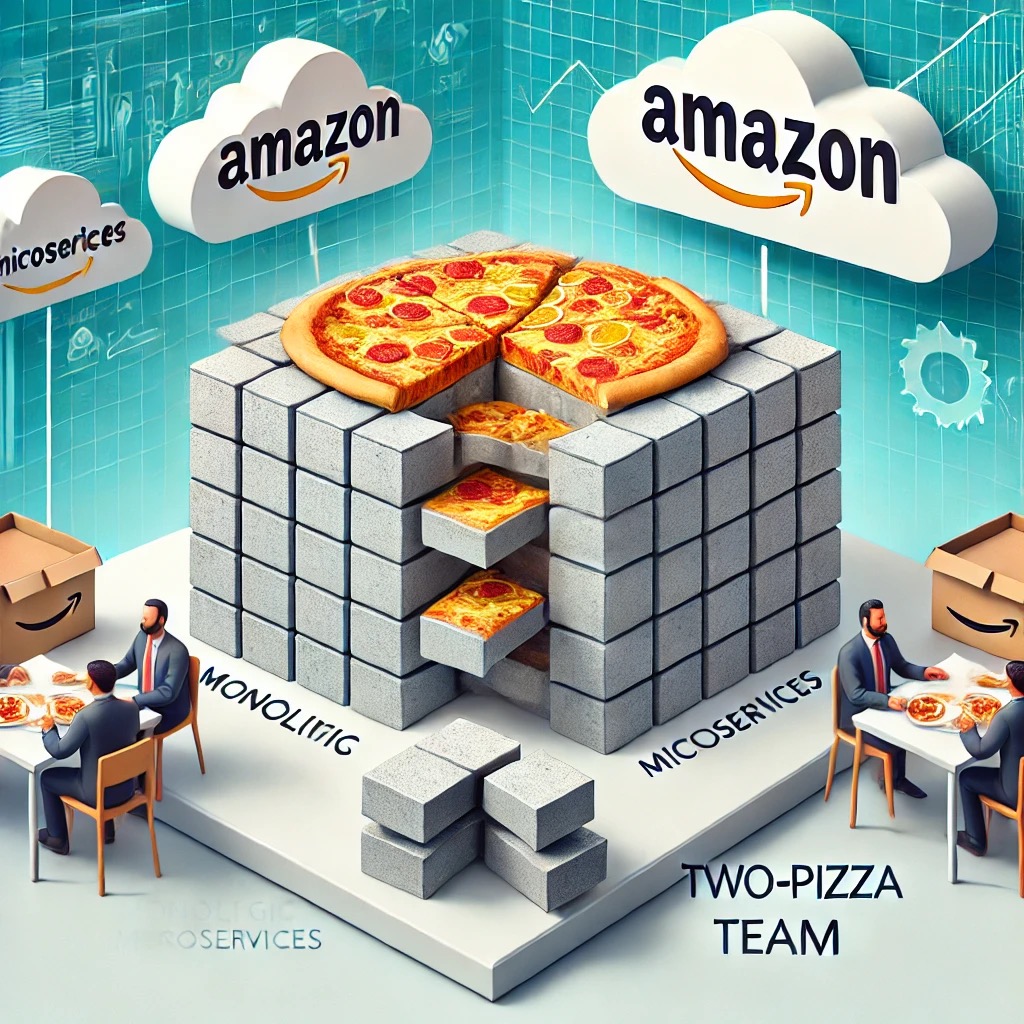
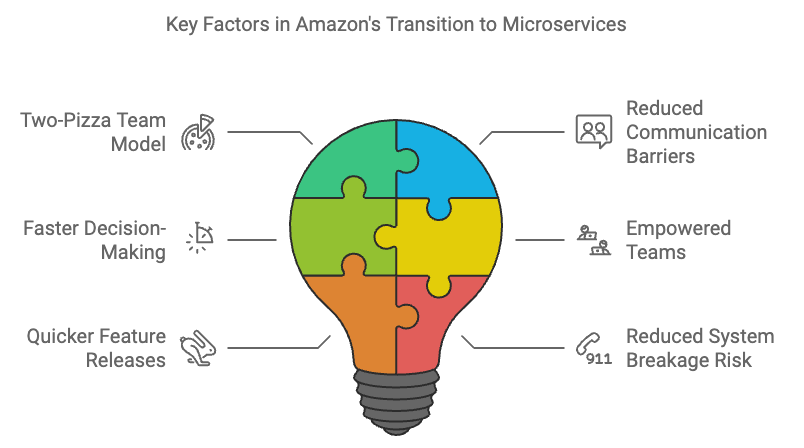
The Two-Pizza Team Concept
One of the cultural shifts that helped make this transition work at Amazon was the introduction of the “two-pizza team” model. The idea was simple: teams should be small enough to be fed by two pizzas. Smaller teams have fewer communication barriers, which allows them to move faster and make decisions autonomously. Combined with microservices, this empowered Amazon’s teams to release features more quickly and with less risk of breaking the overall system.
The Benefits of Microservices
The shift from monolith to microservices brought several key benefits to Amazon, and many of these benefits apply universally to organizations making the transition today.
Faster Innovation: Since teams no longer have to coordinate every feature release with other teams, they can move faster. This leads to more frequent updates and a shorter time-to-market for new features.
Improved Scalability: Microservices allow you to scale individual components of your application independently. If one service is under heavy load, you can scale only that service, rather than the entire application, reducing both cost and complexity.
Better Fault Isolation: With a monolithic system, a failure in one part of the application can bring down the entire system. In contrast, microservices are isolated from one another, so if one service fails, the others can continue to operate.
Technology Flexibility: In a monolithic system, you’re often limited to a single technology stack. With microservices, each service can use the most appropriate tools and technologies for its specific requirements. This allows for greater experimentation and flexibility in development.
Challenges in Adopting Microservices
While the benefits of microservices are clear, the transition from a monolithic architecture isn’t without its challenges. It’s important to recognize that microservices introduce a new level of operational complexity.
Service Coordination: With multiple services running independently, keeping them in sync can become complex. Versioning and maintaining API contracts between services requires careful planning.
Monitoring and Debugging: In a microservices architecture, errors and performance issues are often harder to trace. Since each service is decoupled, tracking down the root cause of a problem can involve digging through logs across several services.
Cultural Shifts: For organizations used to working in a monolithic environment, shifting to microservices often requires a change in team structure and communication practices. The two-pizza team model is one way to address this, but it requires buy-in at all levels of the organization.
Is Microservices the Right Move?
The transition from monolith to microservices is a journey, not a destination. While microservices offer significant advantages in terms of scalability, speed, and fault tolerance, they aren’t a one-size-fits-all solution. For smaller or less complex applications, a monolithic architecture might still make sense. However, as systems grow in complexity and demand, microservices provide a proven model for handling that growth in a manageable way.
The key takeaway is this: microservices aren’t just about breaking down your application into smaller pieces; they’re about enabling your teams to work more independently and innovate faster. And in today’s competitive software landscape, that speed can make all the difference.
Imagine you’re an architect, but instead of designing buildings, you’re crafting a network that seamlessly connects your company’s existing data center with the vast capabilities of the AWS cloud. This hybrid network needs to be a fortress of security, able to scale effortlessly as your company grows, and perform like a well-oiled machine. How do you approach this challenge?
Key Components of Your Hybrid Network
Let’s break down the essential tools and services that will make your hybrid network a reality:
AWS Direct Connect: Think of this as a private, high-speed tunnel between your data center and the AWS cloud. It’s like having a dedicated highway for your data, bypassing the traffic jams of the public internet. This ensures lower latency (the time it takes for data to travel) and a faster, more reliable connection.
AWS VPN: While Direct Connect is your primary route, it’s wise to have a backup plan. AWS VPN (Virtual Private Network) acts as a secure secondary connection. If Direct Connect experiences any hiccups, your VPN kicks in, ensuring your network remains available.
VPC Peering: Within the AWS cloud, you’ll likely have multiple Virtual Private Clouds (VPCs) – think of them as separate neighborhoods in your cloud city. VPC Peering allows these VPCs to communicate directly with each other, making it easy to share resources and manage everything from a central location.
AWS Transit Gateway: As your network expands with more VPCs and connections, things can get a bit messy. AWS Transit Gateway acts as a central hub, simplifying traffic routing and management. It’s like having a well-organized traffic control system for your data.
Security Groups and NACLs: Security is paramount in any network. Security Groups and Network ACLs (NACLs) are your virtual guards, controlling what traffic is allowed in and out of your network. They ensure that only authorized data flows between your data center and the AWS cloud.
The Hybrid Network in Action
Now, let’s see how these components work together to create a robust hybrid network:
Imagine that you’re in the control room of a bustling metropolis. Every street, highway, and alley represents a network path, and your task is to ensure that traffic flows smoothly, securely, and efficiently. Here’s how our hybrid network comes to life, step by step.
Direct Connect and VPN –> The Dual Pathways
First, picture AWS Direct Connect as your main highway. It’s a private, high-speed route from your data center directly into AWS, avoiding the congestion and unpredictability of the public internet. This dedicated connection offers the lowest latency and highest performance, much like a VIP lane reserved just for you.
But what happens if there’s a roadblock on this highway? That’s where AWS VPN comes in. It’s like having a well-paved secondary road ready to take on the traffic if your main highway is temporarily closed. The VPN ensures that your data can still travel securely between your data center and AWS, even when the primary route is unavailable.
VPC Peering and Transit Gateway –> The Interconnected Network
Within the AWS cloud, you have several VPCs, each representing a different district of your city. VPC Peering is like building direct bridges between these districts, allowing data to flow freely and resources to be shared seamlessly.
However, as your city grows and more districts (VPCs) are added, managing all these direct connections can become complex. This is where AWS Transit Gateway comes into play. Think of it as the central hub of a massive roundabout, where all the main roads converge. Transit Gateway simplifies the routing process, allowing you to manage and direct traffic efficiently across all your VPCs and on-premises connections. It ensures that data gets where it needs to go, without unnecessary detours.
Security Groups and NACLs –> The Guardians of the Network
As your data travels along these paths, security is paramount. Security Groups and Network ACLs (NACLs) are like the vigilant guards at every checkpoint, scrutinizing every bit of data that passes through. Security Groups work at the instance level, controlling inbound and outbound traffic to specific AWS resources. NACLs, on the other hand, operate at the subnet level, providing an additional layer of security by controlling traffic at the boundaries of your network segments.
Imagine a sensitive document moving from your data center to AWS. It first passes through the Direct Connect highway, with VPN as a backup. Upon reaching AWS, it might need to traverse several VPCs, facilitated by VPC Peering or routed through the Transit Gateway. At each step, Security Groups and NACLs ensure that only authorized data flows, blocking any potential threats.
A Unified Network
Together, these components create a harmonious network. Direct Connect and VPN ensure reliable and secure connectivity. VPC Peering and Transit Gateway manage the efficient routing of data within the cloud. Security Groups and NACLs safeguard your information at every turn.
Visualize a scenario: Your data center is processing a large batch of financial transactions that need to be securely stored and analyzed in AWS. The data travels through Direct Connect, zooming into AWS with minimal delay. As it arrives, it passes through the Security Groups, which verify its credentials. The data is then routed via the Transit Gateway to various VPCs for processing, storage, and analysis. At each VPC, NACLs act as border control, ensuring only legitimate traffic enters. If Direct Connect fails, the VPN immediately takes over, maintaining seamless connectivity.
Building a Robust Hybrid Network
By integrating AWS Direct Connect, VPN, VPC Peering, Transit Gateway, and robust security measures, you’ve constructed a hybrid network that is secure, scalable, and high-performing. This network not only meets the current demands of your company but is also flexible enough to adapt to future growth and technological advancements.
Think of this hybrid network as a dynamic bridge between your on-premises data center and the AWS cloud. With meticulous planning and the right tools, you’ve built a bridge that’s resilient, secure, and capable of handling whatever traffic comes its way, ensuring your business runs smoothly in the ever-evolving digital landscape.
A Secure, Scalable, and High-Performance Hybrid Network
By combining AWS Direct Connect, VPN, VPC Peering, Transit Gateway, and robust security measures, you create a hybrid network that’s not only secure but also highly scalable and efficient. It’s a network that can grow with your company, adapt to changing needs, and provide the performance you need to thrive in the cloud era.
Building a hybrid network is like constructing a bridge between two worlds, your on-premises data center and the AWS cloud. With careful planning and the right tools, you can create a bridge that’s strong, secure, and ready to handle whatever traffic comes its way.
One of the most exciting aspects of cloud computing is the promise of scalability, the ability to expand or contract resources to meet demand. But how do you design an architecture that can handle unexpected traffic spikes without breaking the bank during quieter periods? This question often comes up in AWS Solution Architect interviews, and for good reason. It’s a core challenge that many businesses face when moving to the cloud. Let’s explore some AWS services and strategies that can help you achieve both scalability and cost efficiency.
Building a Dynamic and Cost-Aware AWS Architecture
Imagine your application is like a bustling restaurant. During peak hours, you need a full staff and all tables ready. But during off-peak times, you don’t want to be paying for idle resources. Here’s how we can translate this concept into a scalable AWS architecture:
Auto Scaling Groups (ASGs): Think of ASGs as your restaurant’s staffing manager. They automatically adjust the number of EC2 instances (your servers) based on predefined rules. If your website traffic suddenly spikes, ASGs will spin up additional instances to handle the load. When traffic dies down, they’ll scale back, saving you money. You can even combine ASGs with Spot Instances for even greater cost savings.
Amazon EC2 Spot Instances: These are like the temporary staff you might hire during a particularly busy event. Spot Instances let you take advantage of unused EC2 capacity at a much lower cost. If your demand is unpredictable, Spot Instances can be a great way to save money while ensuring you have enough resources to handle peak loads.
Amazon Lambda: Lambda is your kitchen staff that only gets paid when they’re cooking, and they’re really good at their job, they can whip up a dish in under 15 minutes! It’s a serverless compute service that runs your code in response to events (like a new file being uploaded or a database change). You only pay for the compute time you actually use, making it ideal for sporadic or unpredictable workloads.
AWS Fargate: Fargate is like having a catering service handle your entire kitchen operation. It’s a serverless compute engine for containers, meaning you don’t have to worry about managing the underlying servers. Fargate automatically scales your containerized applications based on demand, and you only pay for the resources your containers consume.
How the Pieces Fit Together
Now, let’s see how these services can work together in harmony:
Core Application on EC2 with Auto Scaling: Your main application might run on EC2 instances within an Auto Scaling Group. You can configure this group to monitor the CPU utilization of your servers and automatically launch new instances if the average CPU usage reaches a threshold, such as 75% (this is known as a Target Tracking Scaling Policy). This ensures you always have enough servers running to handle the current load, even during unexpected traffic spikes.
Spot Instances for Cost Optimization: To save costs, you could configure your Auto Scaling Group to use Spot Instances whenever possible. This allows you to take advantage of lower prices while still scaling up when needed. Importantly, you’ll also want to set up a recovery policy within your Auto Scaling Group. This policy ensures that if Spot Instances are not available (due to high demand or price fluctuations), your Auto Scaling Group will automatically launch On-Demand Instances instead. This way, you can reliably meet your application’s resource needs even when Spot Instances are unavailable.
Lambda for Event-Driven Tasks: Lambda functions excel at handling event-driven tasks that don’t require a constantly running server. For example, when a new image is uploaded to your S3 bucket, you can trigger a Lambda function to automatically resize it or convert it to a different format. Similarly, Lambda can be used to send notifications to users when certain events occur in your application, such as a new order being placed or a payment being processed. Since Lambda functions are only active when triggered, they can significantly reduce your costs compared to running dedicated EC2 instances for these tasks.
Fargate for Containerized Microservices: If your application is built using microservices, you can run them in containers on Fargate. This eliminates the need to manage servers and allows you to scale each microservice independently. By decoupling your microservices and using Amazon Simple Queue Service (SQS) queues for communication, you can ensure that even under heavy load, all requests will be handled and none will be lost. For applications where the order of operations is critical, such as financial transactions or order processing, you can use FIFO (First-In-First-Out) SQS queues to maintain the exact order of messages.
Monitoring and Optimization: Imagine having a restaurant manager who constantly monitors how busy the restaurant is, how much food is being wasted, and how satisfied the customers are. This is what Amazon CloudWatch does for your AWS environment. It provides detailed metrics and alarms, allowing you to fine-tune your scaling policies and optimize your resource usage. With CloudWatch, you can visualize the health and performance of your entire AWS infrastructure at a glance through intuitive dashboards and graphs. These visualizations make it easy to identify trends, spot potential issues, and make informed decisions about resource allocation and optimization.
The Outcome, A Satisfied Customer and a Healthy Bottom Line
By combining these AWS services and strategies, you can build a cloud architecture that is both scalable and cost-effective. This means your application can gracefully handle unexpected traffic spikes, ensuring a smooth user experience even during peak demand. At the same time, you won’t be paying for idle resources during quieter periods, keeping your cloud costs under control.
Final Analysis
Designing for scalability and cost efficiency is a fundamental aspect of cloud architecture. By leveraging AWS services like Auto Scaling, EC2 Spot Instances, Lambda, and Fargate, you can create a dynamic and responsive environment that adapts to your application’s needs. Remember, the key is to understand your workload patterns and choose the right tools for the job. With careful planning and the right AWS services, you can build a cloud architecture that is both powerful and cost-effective, setting your business up for success in the cloud and in the restaurant. 😉