HighAvailability

Your Multi-Region strategy is a fantasy

The recent failure showed us the truth: your data is stuck, and active-active failover is a fantasy for 99% of us. Here’s a pragmatic high-availability strategy that actually works.

Well, that was an intense week.

When the great AWS outage of October 2025 hit, I did what every senior IT person does: I grabbed my largest coffee mug, opened our monitoring dashboard, and settled in to watch the world burn. us-east-1, the internet’s stubbornly persistent center of gravity, was having what you’d call a very bad day.

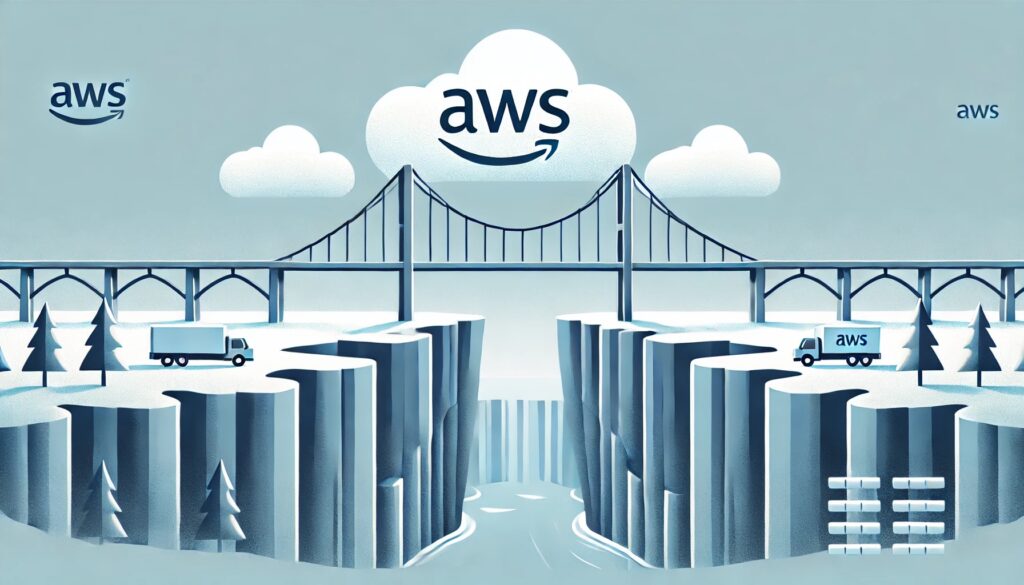
And just like clockwork, as the post-mortems rolled in, the old, tired refrain started up on social media and in Slack: “This is why you must be multi-region.”

I’m going to tell you the truth that vendors, conference speakers, and that one overly enthusiastic junior dev on your team won’t. For 99% of companies, “multi-region” is a lie.

It’s an expensive, complex, and dangerous myth sold as a silver bullet. And the recent outage just proved it.

The “Just Be Multi-Region” fantasy

On paper, it sounds so simple. It’s a lullaby for VPs.

You just run your app in us-east-1 (Virginia) and us-west-2 (Oregon). You put a shiny global load balancer in front, and if Virginia decides to spontaneously become an underwater volcano, poof! All your traffic seamlessly fails over to Oregon. Zero downtime. The SREs are heroes. Champagne for everyone.

This is a fantasy.

It’s a fantasy that costs millions of dollars and lures development teams into a labyrinth of complexity they will never escape. I’ve spent my career building systems that need to stay online. I’ve sat in the planning meetings and priced out the “real” cost. Let me tell you, true active-active multi-region isn’t just “hard”; it’s a completely different class of engineering.

And it’s one that your company almost certainly doesn’t need.

The three killers of Multi-Region dreams

It’s not the application servers. Spinning up EC2 instances or containers in another region is the easy part. That’s what we have Infrastructure as Code for. Any intern can do that.

The problem isn’t the compute. The problem is, and always has been, the data.

Killer 1: Data has gravity, and it’s a jerk

This is the single most important concept in cloud architecture. Data has gravity.

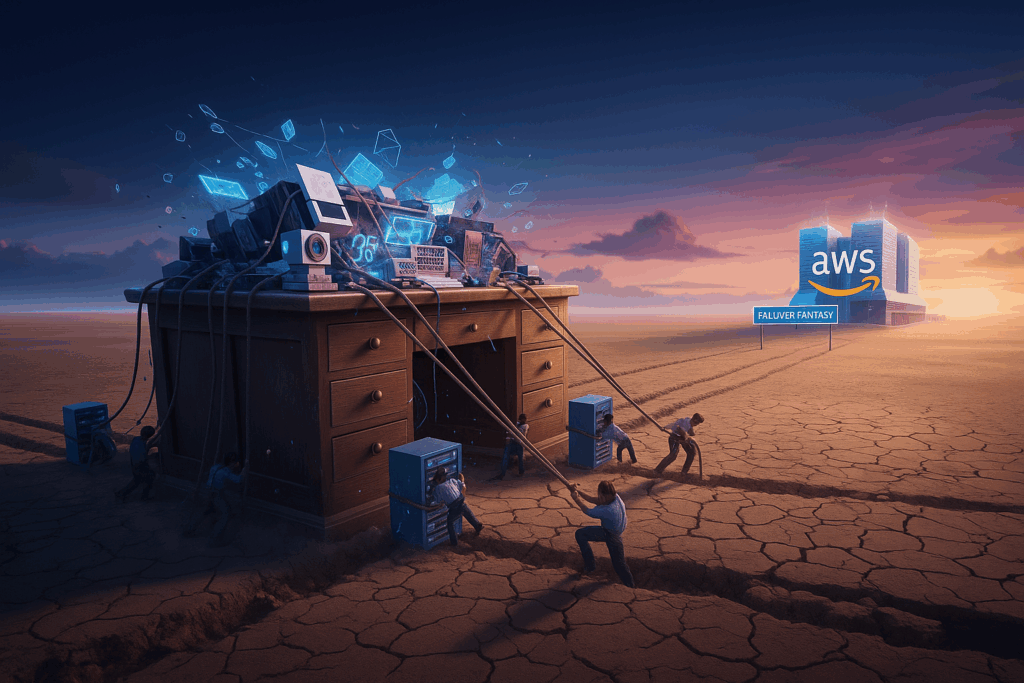
Your application code is a PDF. It’s stateless and lightweight. You can email it, copy it, and run it anywhere. Your 10TB PostgreSQL database is not a PDF. It’s the 300-pound antique oak desk the computer is sitting on. You can’t just “seamlessly fail it over” to another continent.

To have a true seamless failover, your data must be available in the second region at the exact moment of the failure. This means you need synchronous, real-time replication across thousands of miles.

Guess what that does to your write performance? It’s like trying to have a conversation with someone on Mars. The latency of a round-trip from Virginia to Oregon adds hundreds of milliseconds to every single database write. The application becomes unusably slow. Every time a user clicks “save,” they have to wait for a photon to physically travel across the country and back. Your users will hate it.

“Okay,” you say, “we’ll use asynchronous replication!”

Great. Now when us-east-1 fails, you’ve lost the last 5 minutes of data. Every transaction, every new user sign-up, every shopping cart order. Vanished. You’ve traded a “Recovery Time” of zero for a “Data Loss” that is completely unacceptable. Go explain to the finance department that you purposefully designed a system that throws away the most recent customer orders. I’ll wait.

This is the trap. Your compute is portable; your data is anchored.

Killer 2: The astronomical cost

I was on a project once where the CTO, fresh from a vendor conference, wanted a full active-active multi-region setup. We scoped it.

Running 2x the servers was fine. The real cost was the inter-region data transfer.

AWS (and all cloud providers) charge an absolute fortune for data moving between their regions. It’s the “hotel minibar” of cloud services. Every single byte your database replicates, every log, every file transfer… cha-ching.

Our projected bill for the data replication and the specialized services (like Aurora Global Databases or DynamoDB Global Tables) was three times the cost of the entire rest of the infrastructure.

You are paying a massive premium for a fleet of servers, databases, and network gateways that are sitting idle 99.9% of the time. It’s like buying the world’s most expensive gym membership and only going once every five years to “test” it. It’s an insurance policy so expensive, you can’t afford the disaster it’s meant to protect you from.

Killer 3: The crushing complexity

A multi-region system isn’t just two copies of your app. It’s a brand new, highly complex, slightly psychotic distributed system that you now have to feed and care for.

You now have to solve problems you never even thought about:

  • Global DNS failover: How does Route 53 know a region is down? Health checks fail. But what if the health check itself fails? What if the health check thinks Virginia is fine, but it’s just hallucinating?
  • Data write conflicts: This is the fun part. What if a user in New York (writing to us-east-1) and a user in California (writing to us-west-2) update the same record at the same time? Welcome to the world of split-brain. Who wins? Nobody. You now have two “canonical” truths, and your database is having an existential crisis. Your job just went from “Cloud Architect” to “Data Therapist.”
  • Testing: How do you even test a full regional failover? Do you have a big red “Kill Virginia” button? Are you sure you know what will happen when you press it? On a Tuesday afternoon? I didn’t think so.

You haven’t just doubled your infrastructure; you’ve 10x’d your architectural complexity.

But we have Kubernetes because we are Cloud Native

This was my favorite part of the October 2025 outage.

I saw so many teams that thought Kubernetes would save them. They had their fancy federated K8s clusters spanning multiple regions, YAML files as far as the eye could see.

And they still went down.

Why? Because Kubernetes doesn’t solve data gravity!

Your K8s cluster in us-west-2 dutifully spun up all your application pods. They woke up, stretched, and immediately started screaming: “WHERE IS MY DISK?!”

Your persistent volumes (PVs) are backed by EBS or EFS. That ‘E’ stands for ‘Elastic,’ not ‘Extradimensional.’ That disk is physically, stubbornly, regionally attached to Virginia. Your pods in Oregon can’t mount a disk that lives 3,000 miles away.

Unless you’ve invested in another layer of incredibly complex, eye-wateringly expensive storage replication software, your “cloud-native” K8s cluster was just a collection of very expensive, very confused applications shouting into the void for a database that was currently offline.

A pragmatic high availability strategy that actually works

So if multi-region is a lie, what do we do? Just give up? Go home? Take up farming?

Yes. You accept some downtime.

You stop chasing the “five nines” (99.999%) myth and start being honest with the business. Your goal is not “zero downtime.” Your goal is a tested and predictable recovery.

Here is the sane strategy.

1. Embrace Multi-AZ (The real HA)

This is what AWS actually means by “high availability.” Run your application across multiple Availability Zones (AZs) within a single region. An AZ is a physically separate data center. us-east-1a and us-east-1b are miles apart, with different power and network.

This is like having a backup generator for your house. Multi-region is like building an identical, fully-furnished duplicate house in another city just in case a meteor hits your first one.

Use a Multi-AZ RDS instance. Use an Auto Scaling Group that spans AZs. This protects you from 99% of common failures: a server rack dying, a network switch failing, or a construction crew cutting a fiber line. This should be your default. It’s cheap, it’s easy, and it works.

2. Focus on RTO and RPO

Stop talking about “nines” and start talking about two simple numbers:

  • RTO (Recovery Time Objective): How fast do we need to be back up?
  • RPO (Recovery Point Objective): How much data can we afford to lose?

Get a real answer from the business, not a fantasy. Is a 4-hour RTO and a 15-minute RPO acceptable? For almost everyone, the answer is yes.

3. Build a “Warm Standby” (The sane DR)

This is the strategy that actually works. It’s the “fire drill” plan, not the “build a duplicate city” plan.

  • Infrastructure: Your entire infrastructure is defined in Terraform or CloudFormation. You can rebuild it from scratch in any region with a single command.
  • Data: You take regular snapshots of your database (e.g., every 15 minutes) and automatically copy them to your disaster recovery region (us-west-2).
  • The plan: When us-east-1 dies, you declare a disaster. The on-call engineer runs the “Deploy-to-DR” script.

Here’s a taste of what that “sane” infrastructure-as-code looks like. You’re not paying for two of everything. You’re paying for a blueprint and a backup.

# main.tf (in your primary region module)
# This is just a normal server
resource "aws_instance" "app_server" {
  count         = 3 # Your normal production count
  ami           = "ami-0abcdef123456"
  instance_type = "t3.large"
  # ... other config
}

# dr.tf (in your DR region module)
# This server doesn't even exist... until you need it.
resource "aws_instance" "dr_app_server" {
  # This is the magic.
  # This resource is "off" by default (count = 0).
  # You flip one variable (is_disaster = true) to build it.
  count         = var.is_disaster ? 3 : 0
  provider      = aws.dr_region # Pointing to us-west-2
  ami           = "ami-0abcdef123456" # Same AMI
  instance_type = "t3.large"
  # ... other config
}

resource "aws_db_instance" "dr_database" {
  count                   = var.is_disaster ? 1 : 0
  provider                = aws.dr_region
  
  # Here it is: You build the new DB from the
  # latest snapshot you've been copying over.
  replicate_source_db     = var.latest_db_snapshot_arn
  
  instance_class          = "db.r5.large"
  # ... other config
}

You flip a single DNS record in Route 53 to point all traffic to the new load balancer in us-west-2.

Yes, you have downtime (your RTO of 2–4 hours). Yes, you might lose 15 minutes of data (your RPO).

But here’s the beautiful part: it actually works, it’s testable, and it costs a tiny fraction of an active-active setup.

The AWS outage in October 2025 wasn’t a lesson in the need for multi-region. It was a global, public, costly lesson in humility. It was a reminder to stop chasing mythical architectures that look good on a conference whiteboard and focus on building resilient, recoverable systems.

So, stop feeling guilty because your setup doesn’t span three continents. You’re not lazy; you’re pragmatic. You’re the sane one in a room full of people passionately arguing about the best way to build a teleporter for that 300-pound antique oak desk.

Let them have their complex, split-brain, data-therapy sessions. You’ve chosen a boring, reliable, testable “warm standby.” You’ve chosen to get some sleep.

AWS Disaster Recovery simplified for every business

Let’s talk about something really important, even if it’s not always the most glamorous topic: keeping your AWS-based applications running, no matter what. We’re going to explore the world of High Availability (HA) and Disaster Recovery (DR). Think of it as building a castle strong enough to withstand a dragon attack, or, you know, a server outage..

Why all the fuss about Disaster Recovery?

Businesses run on applications. These are the engines that power everything from online shopping to, well, pretty much anything digital. If those engines sputter and die, bad things happen. Money gets lost. Customers get frustrated. Reputations get tarnished. High Availability and Disaster Recovery are all about making sure those engines keep running, even when things go wrong. It’s about resilience.

Before we jump into solutions, we need to understand two key measurements:

  • Recovery Time Objective (RTO): How long can you afford to be down? Minutes? Hours? Days? This is your RTO.
  • Recovery Point Objective (RPO): How much data can you afford to lose? The last hour’s worth? The last days? That’s your RPO.

Think of RTO and RPO as your “pain tolerance” levels. A low RTO and RPO mean you need things back up and running fast, with minimal data loss. A higher RTO and RPO mean you can tolerate a bit more downtime and data loss. The correct option will depend on your business needs.

Disaster recovery strategies on AWS, from basic to bulletproof

AWS offers a toolbox of options, from simple backups to fully redundant, multi-region setups. Let’s explore a few common strategies, like choosing the right level of armor for your knight:

  1. Pilot Light: Imagine keeping the pilot light lit on your stove. It’s not doing much, but it’s ready to ignite the main burner at any moment. In AWS terms, this means having the bare minimum running, maybe a database replica syncing data in another region, and your server configurations saved as templates (AMIs). When disaster strikes, you “turn on the gas”, launch those servers, connect them to the database, and you’re back in business.
    • Good for: Cost-conscious applications where you can tolerate a few hours of downtime.
    • AWS Services: RDS Multi-AZ (for database replication), Amazon S3 cross-region replication, EC2 AMIs.
  2. Warm Standby: This is like having a smaller, backup stove already plugged in and warmed up. It’s not as powerful as your main stove, but it can handle the basic cooking while the main one is being repaired. In AWS, you’d have a scaled-down version of your application running in another region. It’s ready to handle traffic, but you might need to scale it up (add more “burners”) to handle the full load.
    • Good for: Applications where you need faster recovery than Pilot Light, but you still want to control costs.
    • AWS Services: Auto Scaling (to automatically adjust capacity), Amazon EC2, Amazon RDS.
  3. Active/Active (Multi-Region): This is the “two full kitchens” approach. You have identical setups running in multiple AWS regions simultaneously. If one kitchen goes down, the other one is already cooking, and your customers barely notice a thing. You use AWS Route 53 (think of it as a smart traffic controller) to send users to the closest or healthiest “kitchen.”
    • Good for: Mission-critical applications where downtime is simply unacceptable.
    • AWS Services: Route 53 (with health checks and failover routing), Amazon EC2, Amazon RDS, DynamoDB global tables.

Picking the right armor, It’s all about trade-offs

There’s no “one-size-fits-all” answer. The best strategy depends on those RTO/RPO targets we talked about, and, of course, your budget.

Here’s a simple way to think about it:

  • Tight RTO/RPO, Budget No Object? Active/Active is your champion.
  • Need Fast Recovery, But Watching Costs? Warm Standby is a good compromise.
  • Can Tolerate Some Downtime, Prioritizing Cost Savings? Pilot Light is your friend.
  • Minimum RTO/RPO and Minimum Budget? Backups.

The trick is to be honest about your real needs. Don’t build a fortress if a sturdy wall will do.

A quick glimpse at implementation

Let’s say you’re going with the Pilot Light approach. You could:

  1. Set up Amazon S3 Cross-Region Replication to copy your important data to another AWS region.
  2. Create an Amazon Machine Image (AMI) of your application server. This is like a snapshot of your server’s configuration.
  3. Store that AMI in the backup region.

In a disaster scenario, you’d launch EC2 instances from that AMI, connect them to your replicated data, and point your DNS to the new instances.

Tools like AWS Elastic Disaster Recovery (a managed service) or CloudFormation (for infrastructure-as-code) can automate much of this process, making it less of a headache.

Testing, Testing, 1, 2, 3…

You wouldn’t buy a car without a test drive, right? The same goes for disaster recovery. You must test your plan regularly.

Simulate a failure. Shut down resources in your primary region. See how long it takes to recover. Use AWS CloudWatch metrics to measure your actual RTO and RPO. This is how you find the weak spots before a real disaster hits. It’s like fire drills for your application.

The takeaway, be prepared, not scared

Disaster recovery might seem daunting, but it doesn’t have to be. AWS provides the tools, and with a bit of planning and testing, you can build a resilient architecture that can weather the storm. It’s about peace of mind, knowing that your business can keep running, no matter what. Start small, test often, and build up your defenses over time.

Boost Performance and Resilience with AWS EC2 Placement Groups

There’s a hidden art to placing your EC2 instances in AWS. It’s not just about spinning up machines and hoping for the best, where they land in AWS’s vast infrastructure can make all the difference in performance, resilience, and cost. This is where Placement Groups come in.

You might have deployed instances before without worrying about placement, and for many workloads, that’s perfectly fine. But when your application needs lightning-fast communication, fault tolerance, or optimized performance, Placement Groups become a critical tool in your AWS arsenal.

Let’s break it down.

What are Placement Groups?

AWS Placement Groups give you control over how your EC2 instances are positioned within AWS’s data centers. Instead of leaving it to chance, you can specify how close, or how far apart, your instances should be placed. This helps optimize either latency, fault tolerance, or a balance of both.

There are three types of Placement Groups: Cluster, Spread, and Partition. Each serves a different purpose, and choosing the right one depends on your application’s needs.

Types of Placement Groups and when to use them

Cluster Placement Groups for speed over everything

Think of Cluster Placement Groups like a Formula 1 pit crew. Every millisecond counts, and your instances need to communicate at breakneck speeds. AWS achieves this by placing them on the same physical hardware, minimizing latency, and maximizing network throughput.

This is perfect for:
✅ High-performance computing (HPC) clusters
✅ Real-time financial trading systems
✅ Large-scale data processing (big data, AI, and ML workloads)

⚠️ The Trade-off: While these instances talk to each other at lightning speed, they’re all packed together on the same hardware. If that hardware fails, everything inside the Cluster Placement Group goes down with it.

Spread Placement Groups for maximum resilience

Now, imagine you’re managing a set of VIP guests at a high-profile event. Instead of seating them all at the same table (risking one bad spill ruining their night), you spread them out across different areas. That’s what Spread Placement Groups do, they distribute instances across separate physical machines to reduce the impact of hardware failure.

Best suited for:
✅ Mission-critical applications that need high availability
✅ Databases requiring redundancy across multiple nodes
✅ Low-latency, fault-tolerant applications

⚠️ The Limitation: AWS allows only seven instances per Availability Zone in a Spread Placement Group. If your application needs more, you may need to rethink your architecture.

Partition Placement Groups, the best of both worlds approach

Partition Placement Groups work like a warehouse with multiple sections, each with its power supply. If one section loses power, the others keep running. AWS follows the same principle, grouping instances into multiple partitions spread across different racks of hardware. This provides both high performance and resilience, a sweet spot between Cluster and Spread Placement Groups.

Best for:
✅ Distributed databases like Cassandra, HDFS, or Hadoop
✅ Large-scale analytics workloads
✅ Applications needing both performance and fault tolerance

⚠️ AWS’s Partitioning Rule: The number of partitions you can use depends on the AWS Region, and you must carefully plan how instances are distributed.

How to Configure Placement Groups

Setting up a Placement Group is straightforward, and you can do it using the AWS Management Console, AWS CLI, or an SDK.

Example using AWS CLI

Let’s create a Cluster Placement Group:

aws ec2 create-placement-group --group-name my-cluster-group --strategy cluster

Now, launch an instance into the group:

aws ec2 run-instances --image-id ami-12345678 --count 1 --instance-type c5.large --placement GroupName=my-cluster-group

For Spread and Partition Placement Groups, simply change the strategy:

aws ec2 create-placement-group --group-name my-spread-group --strategy spread
aws ec2 create-placement-group --group-name my-partition-group --strategy partition

Best practices for using Placement Groups

🚀 Combine with Multi-AZ Deployments: Placement Groups work within a single Availability Zone, so consider spanning multiple AZs for maximum resilience.

📊 Monitor Network Performance: AWS doesn’t guarantee placement if your instance type isn’t supported or there’s insufficient capacity. Always benchmark your performance after deployment.

💰 Balance Cost and Performance: Cluster Placement Groups give the fastest network speeds, but they also increase failure risk. If high availability is critical, Spread or Partition Groups might be a better fit.

Final thoughts

AWS Placement Groups are a powerful but often overlooked feature. They allow you to maximize performance, minimize downtime, and optimize costs, but only if you choose the right type.

The next time you deploy EC2 instances, don’t just launch them randomly, placement matters. Choose wisely, and your infrastructure will thank you for it.

How to ensure high availability for pods in Kubernetes

I was thinking the other day about these Kubernetes pods, and how they’re like little spaceships floating around in the cluster. But what happens if one of those spaceships suddenly vanishes? Poof! Gone! That’s a real problem. So I started wondering, how can we ensure our pods are always there, ready to do their job, even if things go wrong? It’s like trying to keep a juggling act going while someone’s moving the floor around you…

Let me tell you about this tool called Karpenter. It’s like a super-efficient hotel manager for our Kubernetes worker nodes, always trying to arrange the “guests” (our applications) most cost-effectively. Sometimes, this means moving guests from one room to another to save on operating costs. In Kubernetes terminology, we call this “consolidation.”

The dancing pods challenge

Here’s the thing: We have this wonderful hotel manager (Karpenter) who’s doing a fantastic job, keeping costs down by constantly optimizing room assignments. But what about our guests (the applications)? They might get a bit dizzy with all this moving around, and sometimes, their important work gets disrupted.

So, the question is: How do we keep our applications running smoothly while still allowing Karpenter to do its magic? It’s like trying to keep a circus performance going while the stage crew rearranges the set in the middle of the act.

Understanding the moving parts

Before we explore the solutions, let’s take a peek behind the scenes and see what happens when Karpenter decides to relocate our applications. It’s quite a fascinating process:

First, Karpenter puts up a “Do Not Disturb” sign (technically called a taint) on the node it wants to clear. Then, it finds new accommodations for all the applications. Finally, it carefully moves each application to its new location.

Think of it as a well-choreographed dance where each step must be perfectly timed to avoid any missteps.

The art of high availability

Now, for the exciting part, we have some clever tricks up our sleeves to ensure our applications keep running smoothly:

  1. The buddy system: The first rule of high availability is simple: never go it alone! Instead of running a single instance of your application, run at least two. It’s like having a backup singer, if one voice falters, the show goes on. In Kubernetes, we do this by setting replicas: 2 in our deployment configuration.
  2. Strategic placement: Here’s a neat trick: we can tell Kubernetes to spread our application copies across different physical machines. It’s like not putting all your eggs in one basket. We use something called “Pod Topology Spread Constraints” for this. Here’s how it looks in practice:
topologySpreadConstraints:
  - maxSkew: 1
    topologyKey: kubernetes.io/hostname
    whenUnsatisfiable: DoNotSchedule
    labelSelector:
      matchLabels:
        app: your-app
  1. Setting boundaries: Remember when your parents set rules about how many cookies you could eat? We do something similar in Kubernetes with PodDisruptionBudgets (PDB). We tell Kubernetes, “Hey, you must always keep at least 50% of my application instances running.” This prevents our hotel manager from getting too enthusiastic about rearranging things.
  2. The “Do Not Disturb” sign: For those special cases where we absolutely don’t want an application to be moved, we can put up a permanent “Do Not Disturb” sign using the karpenter.sh/do-not-disrupt: “true” annotation. It’s like having a VIP guest who gets to keep their room no matter what.

The complete picture

The beauty of this system lies in how all the pieces work together. Think of it as a safety net with multiple layers:

  • Multiple instances ensure basic redundancy.
  • Strategic placement keeps instances separated.
  • PodDisruptionBudgets prevent too many moves at once.
  • And when necessary, we can completely prevent disruption.

A real example

Let me paint you a picture. Imagine you’re running a critical web service. Here’s how you might set it up:

apiVersion: apps/v1
kind: Deployment
metadata:
  name: critical-web-service
spec:
  replicas: 2
  template:
    metadata:
      annotations:
        karpenter.sh/do-not-disrupt: "false"  # We allow movement, but with controls
    spec:
      topologySpreadConstraints:
        - maxSkew: 1
          topologyKey: kubernetes.io/hostname
          whenUnsatisfiable: DoNotSchedule
---
apiVersion: policy/v1
kind: PodDisruptionBudget
metadata:
  name: critical-web-service-pdb
spec:
  minAvailable: 50%
  selector:
    matchLabels:
      app: critical-web-service

The result

With these patterns in place, our applications become incredibly resilient. They can handle node failures, scale smoothly, and even survive Karpenter’s optimization efforts without any downtime. It’s like having a self-healing system that keeps your services running no matter what happens behind the scenes.

High availability isn’t just about having multiple copies of our application, it’s about thoughtfully designing how those copies are managed and maintained. By understanding and implementing these patterns, we are not just running applications in Kubernetes; we are crafting reliable, resilient services that can weather any storm.

The next time you deploy an application to Kubernetes, think about these patterns. They might just save you from that dreaded 3 AM wake-up call about your service being down!

Building resilient AWS infrastructure

Imagine building a house of cards. One slight bump and the whole structure comes tumbling down. Now, imagine if your AWS infrastructure was like that house of cards, a scary thought, right? That’s exactly what happens when we have single points of failure in our cloud architecture.

We’re setting ourselves up for trouble when we build systems that depend on a single critical component. If that component fails, the entire system can come crashing down like the house of cards. Instead, we want our infrastructure to resemble a well-engineered skyscraper: stable, robust, and designed with the foresight that no one piece can bring everything down. By thinking ahead and using the right tools, we can build systems that are resilient, adaptable, and ready for anything.

Why should you care about high availability?

Let me start with a story. A few years ago, a major e-commerce company lost millions in revenue when its primary database server crashed during Black Friday. The problem? They had no redundancy in place. It was like trying to cross a river with just one bridge,  when that bridge failed, they were completely stuck. In the cloud era, having a single point of failure isn’t just risky, it’s entirely avoidable.

AWS provides us with incredible tools to build resilient systems, kind of like having multiple bridges, boats, and even helicopters to cross that river. Let’s explore how to use these tools effectively.

Starting at the edge with DNS and content delivery

Think of DNS as the reception desk of your application. AWS Route 53, its DNS service, is like having multiple receptionists who know exactly where to direct your visitors, even if one of them takes a break. Here’s how to make it bulletproof:

  • Health checks: Route 53 constantly monitors your endpoints, like a vigilant security guard. If something goes wrong, it automatically redirects traffic to healthy resources.
  • Multiple routing policies: You can set up different routing rules based on:
    • Geolocation: Direct users based on their location.
    • Latency: Route traffic to the endpoint that provides the lowest latency.
    • Failover: Automatically direct users to a backup endpoint if the primary one fails.
  • Application recovery controller: Think of this as your disaster recovery command center. It manages complex failover scenarios automatically, giving you the control needed to respond effectively.

But we can make things even better. CloudFront, AWS’s content delivery network, acts like having local stores in every neighborhood instead of one central warehouse. This ensures users get data from the closest location, reducing latency. Add AWS Shield and WAF, and you’ve got bouncers at every door, protecting against DDoS attacks and malicious traffic.

The load balancing dance

Load balancers are like traffic cops directing cars at a busy intersection. The key is choosing the right one:

  • Application Load Balancer (ALB): Ideal for HTTP/HTTPS traffic, like a sophisticated traffic controller that knows where each type of vehicle needs to go.
  • Network Load Balancer (NLB): When you need ultra-high performance and static IP addresses, think of it as an express lane for your traffic, ideal for low-latency use cases.
  • Cross-Zone Load Balancing: This is a feature of both Application Load Balancers (ALB) and Network Load Balancers (NLB). It ensures that even if one availability zone is busier than others, the traffic gets distributed evenly like a good parent sharing cookies equally among children.

The art of auto scaling

Auto Scaling Groups (ASG) are like having a smart hiring manager who knows exactly when to bring in more help and when to reduce staff. Here’s how to make them work effectively:

  • Multiple Availability Zones: Never put all your eggs in one basket. Spread your instances across different AZs to avoid single points of failure.
  • Launch Templates: Think of these as detailed job descriptions for your instances. They ensure consistency in the configuration of your resources and make it easy to replicate settings whenever needed.
  • Scaling Policies: Use CloudWatch alarms to trigger scaling actions based on metrics like CPU usage or request count. For instance, if CPU utilization exceeds 70%, you can automatically add more instances to handle the increased load. This type of setup is known as a Tracking Policy, where scaling actions are determined by monitoring key metrics like CPU utilization.

The backend symphony

Your backend layer needs to be as resilient as the front end. Here’s how to achieve that:

  • Stateless design: Each server should be like a replaceable worker, able to handle any task without needing to remember previous interactions. Stateless servers make scaling easier and ensure that no single instance becomes critical.
  • Caching strategy: ElastiCache acts like a team’s shared notebook, frequently needed information is always at hand. This reduces the load on your databases and improves response times.
  • Message queuing: Services like SQS and MSK ensure that if one part of your system gets overwhelmed, messages wait patiently in line instead of getting lost. This decouples your components, making the whole system more resilient.

The data layer foundation

Your data layer is like the foundation of a building, it needs to be rock solid. Here’s how to achieve that:

  • RDS Multi-AZ: Your database gets a perfect clone in another availability zone, ready to take over in milliseconds if needed. This provides fault tolerance for critical data.
  • DynamoDB Global tables: Think of these as synchronized notebooks in different offices around the world. They allow you to read and write data across regions, providing low-latency access and redundancy.
  • Aurora Global Database: Imagine having multiple synchronized libraries across different continents. With Aurora, you get global resilience with fast failover capabilities that ensure continuity even during regional outages.

Monitoring and management

You need eyes and ears everywhere in your infrastructure. Here’s how to set that up:

  • AWS Systems Manager: This serves as your central command center for configuration management, enabling you to automate operational tasks across your AWS resources.
  • CloudWatch: It’s your all-seeing eye for monitoring and alerting. Set alarms for resource usage, errors, and performance metrics to get notified before small issues escalate.
  • AWS Config: It’s like having a compliance officer, constantly checking that everything in your environment follows the rules and best practices. By the way, Have you wondered how to configure AWS Config if you need to apply its rules across an infrastructure spread over multiple regions? We’ll cover that in another article.

Best practices and common pitfalls

Here are some golden rules to live by:

  • Regular testing: Don’t wait for a real disaster to test your failover mechanisms. Conduct frequent disaster recovery drills to ensure that your systems and teams are ready for anything.
  • Documentation: Keep clear runbooks, they’re like instruction manuals for your infrastructure, detailing how to respond to incidents and maintain uptime.
  • Avoid these common mistakes:
    • Forgetting to test failover procedures
    • Neglecting to monitor all components, especially those that may seem trivial
    • Assuming that AWS services alone guarantee high availability, resilience requires thoughtful architecture

In a Few Words

Building a truly resilient AWS infrastructure is like conducting an orchestra, every component needs to play its part perfectly. But with careful planning and the right use of AWS services, you can create a system that stays running even when things go wrong.

The goal isn’t just to eliminate single points of failure, it’s to build an infrastructure so resilient that your users never even notice when something goes wrong. Because the best high-availability system is one that makes downtime invisible.

Ready to start building your bulletproof infrastructure? Start with one component at a time, test thoroughly, and gradually build up to a fully resilient system. Your future self (and your users) will thank you for it.

Route 53 --> Alias Record --> External Load Balancer --> ASG (Front Layer)
           |                                                     |
           v                                                     v
       CloudFront                               Internal Load Balancer
           |                                                     |
           v                                                     v
  AWS Shield + WAF                                    ASG (Back Layer)
                                                             |
                                                             v
                                              Database (Multi-AZ) or 
                                              DynamoDB Global

Types of Failover in Amazon Route 53 Explained Easily

Imagine Amazon Route 53 as a city’s traffic control system that directs cars (internet traffic) to different streets (servers or resources) based on traffic conditions and road health (the health and configuration of your AWS resources).

Active-Active Failover

In an active-active scenario, you have two streets leading to your destination (your website or application), and both are open to traffic all the time. If one street gets blocked (a server fails), traffic simply continues flowing through the other street. This is useful when you want to balance the load between two resources that are always available.

Active-active failover gives you access to all resources during normal operation. In this example, both region 1 and region 2 are active all the time. When a resource becomes unavailable, Route 53 can detect that it’s unhealthy and stop including it when responding to queries.

Active-Passive Failover

In active-passive failover, you have one main street that you prefer all traffic to use (the primary resource) and a secondary street that’s only used if the main one is blocked (the secondary resource is activated only if the primary fails). This method is useful when you have a preferred resource to handle requests but need a backup in case it fails.

Use an active-passive failover configuration when you want a primary resource or group of resources to be available the majority of the time and you want a secondary resource or group of resources to be on standby in case all the primary resources become unavailable.

Configuring Active-Passive Failover with One Primary and One Secondary Resource

This approach is like having one big street and one small street. You use the big street whenever possible because it can handle more traffic or get you to your destination more directly. You only use the small street if there’s construction or a blockage on the big street.

Configuring Active-Passive Failover with Multiple Primary and Secondary Resources

Now imagine you have several big streets and several small streets. All the big ones are your preferred options, and all the small ones are your backup options. Depending on how many big streets are available, you’ll direct traffic to them before considering using the small ones.

Configuring Active-Passive Failover with Weighted Records

This is like having multiple streets leading to your destination, but you give each street a “weight” based on how often you want it used. Some streets (resources) are preferred more than others, and that preference is adjusted by weight. You still have a backup street for when your preferred options aren’t available.

Evaluating Target Health

“Evaluate Target Health” is like having traffic sensors that instantly tell you if a street is blocked. If you’re routing traffic to AWS resources for which you can create alias records, you don’t need to set up separate health checks for those resources. Instead, you enable “Evaluate Target Health” on your alias records, and Route 53 will automatically check the health of those resources. This simplifies setup and keeps your traffic flowing to streets (resources) that are open and healthy without needing additional health configurations.

In short, Amazon Route 53 offers a powerful set of tools that you can use to manage the availability and resilience of your applications through a variety of ways to apply failover configurations. Implementation of such knowledge into the practice of failover strategy will result in keeping your application up and available for the users in cases when any kind of resource fails or gets a downtime outage.