Docker

Trust your images again with Docker Scout

Containers behave perfectly until you check their pockets. Then you find an elderly OpenSSL and a handful of dusty transitive dependencies that they swore they did not know. Docker Scout is the friend who quietly pats them down at the door, lists what they are carrying, and whispers what to swap so the party does not end with a security incident.

This article is a field guide for getting value from Docker Scout without drowning readers in output dumps. It keeps the code light, focuses on practical moves, and uses everyday analogies instead of cosmic prophecy. By the end, you will have a small set of habits that reduce late‑night pages and cut vulnerability noise to size.

Why scanners overwhelm and what to keep

Most scanners are fantastic at finding problems and terrible at helping you fix the right ones first. You get a laundry basket full of CVEs, you sort by severity, and somehow the pile never shrinks. What you actually need is:

  • Context plus action: show the issues and show exactly what to change, especially base images.
  • Comparison across builds: did this PR make things better or worse?
  • A tidy SBOM: not a PDF doorstop, an artifact you can diff and feed into tooling.

Docker Scout leans into those bits. It plugs into the Docker tools you already use, gives you short summaries when you need them, and longer receipts when auditors appear.

What Docker Scout actually gives you

  • Quick risk snapshot with counts by severity and a plain‑language hint if a base image refresh will clear most of the mess.
  • Targeted recommendations that say “move from X to Y” rather than “good luck with 73 Mediums.”
  • Side‑by‑side comparisons so you can fail a PR only when it truly regresses security.
  • SBOM on demand in useful formats for compliance and diffs.

That mix turns CVE management from whack‑a‑mole into something closer to doing the dishes with a proper rack. The plates dry, nothing falls on the floor, and you get your counter space back.

A five-minute tour

Keep this section handy. It is the minimum set of commands that deliver outsized value.

# 1) Snapshot risk and spot low‑hanging fruit
# Tip: use a concrete tag to keep comparisons honest
docker scout quickview acme/web:1.4.2

# 2) See only the work that unblocks a release
# Critical and High issues that already have fixes
docker scout cves acme/web:1.4.2 \
  --only-severities critical,high \
  --only-fixed

# 3) Ask for the shortest path to green
# Often this is just a base image refresh
docker scout recommendations acme/web:1.4.2

# 4) Check whether a PR helps or hurts
# Fail the check only if the new image is riskier
docker scout compare acme/web:1.4.1 --to acme/web:1.4.2

# 5) Produce an SBOM you can diff and archive
docker scout sbom acme/web:1.4.2 --format cyclonedx-json > sbom.json

Pro tip
Run QuickView first, follow it with recommendations, and treat Compare as your gate. This sequence removes bikeshedding from PR reviews.

One small diagram to keep in your head

Nothing exotic here. You do not need a new mental model, only a couple of strategic checks where they hurt the least.

A pull request check that is sharp but kind

You want security to act like a seatbelt, not a speed bump. The workflow below uploads findings to GitHub Code Scanning for visibility and uses a comparison gate so PRs only fail when risk goes up.

name: Container Security
on: [pull_request, push]

jobs:
  scout:
    runs-on: ubuntu-latest
    permissions:
      contents: read
      pull-requests: write
      security-events: write   # upload SARIF
    steps:
      - uses: actions/checkout@v4

      - name: Login to Docker Hub
        uses: docker/login-action@v3
        with:
          username: ${{ secrets.DOCKERHUB_USERNAME }}
          password: ${{ secrets.DOCKERHUB_TOKEN }}

      - name: Build image
        run: |
          docker build -t ghcr.io/acme/web:${{ github.sha }} .

      - name: Analyze CVEs and upload SARIF
        uses: docker/scout-action@v1
        with:
          command: cves
          image: ghcr.io/acme/web:${{ github.sha }}
          only-severities: critical,high
          only-fixed: true
          sarif-file: scout.sarif

      - name: Upload SARIF to Code Scanning
        uses: github/codeql-action/upload-sarif@v3
        with:
          sarif_file: scout.sarif

      - name: Compare against latest and fail on regression
        if: github.event_name == 'pull_request'
        uses: docker/scout-action@v1
        with:
          command: compare
          image: ghcr.io/acme/web:${{ github.sha }}
          to-latest: true
          exit-on: vulnerability
          only-severities: critical,high

Why this works:

  • SARIF lands in Code Scanning, so the whole team sees issues inline.
  • The compare step keeps momentum. If the PR makes the risk lower than or equal to, it passes. If it makes things worse at High or Critical, it fails.
  • The gate is opinionated about fixed issues, which are the ones you can actually do something about today.

Triage that scales beyond one heroic afternoon

People love big vulnerability cleanups the way they love moving house. It feels productive for a day, and then you are exhausted, and the boxes creep back in. Try this instead:

Set a simple SLA

Push on two levers before touching the application code

  1. Refresh the base image suggested by the recommendations. This often clears the noisy majority in minutes.
  2. Switch to a slimmer base if your app allows it. debian:bookworm-slim or a minimal distroless image reduces attack surface, and your scanner reports will look cleaner because there is simply less there.

Use comparisons to stop bikeshedding
Make the conversation about direction rather than absolutes. If each PR is no worse than the baseline, you are winning.

Document exceptions as artifacts
When something is not reachable or is mitigated elsewhere, record it alongside the SBOM or in your tracking system. Invisible exceptions return like unwashed coffee mugs.

Common traps and how to step around them

The base image is doing most of the damage
If your report looks like a fireworks show, run recommendations. If it says “update base” and you ignore it, you are choosing to mop the floor while the tap stays open.

You still run everything as root
Even perfect CVE hygiene will not save you if the container has god powers. If you can, adopt a non‑root user and a slimmer runtime image. A typical multi‑stage pattern looks like this:

# Build stage
FROM golang:1.22 as builder
WORKDIR /src
COPY . .
RUN CGO_ENABLED=0 GOOS=linux go build -o /bin/app ./cmd/api

# Runtime stage
FROM gcr.io/distroless/static:nonroot
COPY --from=builder /bin/app /app
USER nonroot:nonroot
ENTRYPOINT ["/app"]

Now your scanner report shrinks, and your container stops borrowing the keys to the building.

Your scanner finds Mediums you cannot fix today
Save your energy for issues with available fixes or for regressions. Mediums without fixes belong on a to‑do list, not a release gate.

The team treats the scanner as a chore
Keep the feedback quick and visible. Short PR notes, one SBOM per release, and a small monthly base refresh beat quarterly crusades.

Working with registries without drama

Local images work out of the box. For remote registries, enable analysis where you store images and authenticate normally through Docker. If you are using a private registry such as ECR or ACR, link it through the vendor’s integration or your registry settings, then keep using the same CLI commands. The aim is to avoid side channels and keep your workflow boring on purpose.

A lightweight checklist you can adopt this week

  1. Baseline today: run QuickView on your main images and keep the outputs as a reference.
  2. Gate on direction: use compare in PRs with exit-on: vulnerability limited to High and Critical.
  3. Refresh bases monthly: schedule a small chore day where you accept the recommended base image bumps and rebuild.
  4. Keep an SBOM: publish cyclonedx-json or SPDX for every release so audits are not a scavenger hunt.
  5. Write down exceptions: if you decide not to fix something, make the decision discoverable.

Frequently asked questions you will hear in standups

Can we silence CVEs that we do not ship to production
Yes. Focus on fixed Highs and Criticals, and gate only on regressions. Most other issues are housekeeping.

Will this slow our builds?
Not meaningfully when you keep output small and comparisons tight. It is cheaper than a hotfix sprint on Friday.

Do we need another dashboard?
You need visibility where developers live. Upload SARIF to Code Scanning, and you are done. The fewer tabs, the better.

Final nudge

Security that ships beats security that lectures. Start with a baseline, gate on direction, and keep a steady rhythm of base refreshes. In a couple of sprints, you will notice fewer alarms, fewer debates, and release notes that read like a grocery receipt instead of a hostage letter.

If your containers still show up with suspicious items in their pockets, at least now you can point to the pocket, the store it came from, and the cheaper replacement. That tiny bit of provenance is often the difference between a calm Tuesday and a war room with too much pizza.

If you remember nothing else, remember three habits. Run QuickView on your main images once a week. Let compare guard your pull requests. Accept the base refresh that Scout recommends each month. Everything else is seasoning.

Measure success by absence. Fewer “just-one-hotfix” pings at five on Friday. Fewer meetings where severity taxonomies are debated like baby names. More merges that feel like brushing your teeth, brief, boring, done.

Tools will not make you virtuous, but good routines will. Docker Scout shortens the routine and thins the excuses. Baseline today, set the gate, add a tiny chore to the calendar, and then go do something nicer with your afternoon.

When docker compose stopped being magic

There was a time, not so long ago, when docker-compose up felt like performing a magic trick. You’d scribble a few arcane incantations into a YAML file and, poof, your entire development stack would spring to life. The database, the cache, your API, the frontend… all humming along obediently on localhost. Docker Compose wasn’t just a tool; it was the trusty Swiss Army knife in every developer’s pocket, the reliable friend who always had your back.

Until it didn’t.

Our breakup wasn’t a single, dramatic event. It was a slow fade, the kind of awkward drifting apart that happens when one friend grows and the other… well, the other is perfectly happy staying exactly where they are. It began with small annoyances, then grew into full-blown arguments. We eventually realized we were spending more time trying to fix our relationship with YAML than actually building things.

So, with a heavy heart and a sigh of relief, we finally said goodbye.

The cracks begin to show

As our team and infrastructure matured, our reliable friend started showing some deeply annoying habits. The magic tricks became frustratingly predictable failures.

  • Our services started giving each other the silent treatment. The networking between containers became as fragile and unpredictable as a Wi-Fi connection on a cross-country train. One moment they were chatting happily, the next they wouldn’t be caught dead in the same virtual network.
  • It was worse at keeping secrets than a gossip columnist. The lack of native, secure secret handling was, to put it mildly, a joke. We were practically writing passwords on sticky notes and hoping for the best.
  • It developed a severe case of multiple personality disorder. The same docker-compose.yml file would behave like a well-mannered gentleman on one developer’s machine, a rebellious teenager in staging, and a complete, raving lunatic in production. Consistency was not its strong suit.
  • The phrase “It works on my machine” became a ritualistic chant. We’d repeat it, hoping to appease the demo gods, but they are a fickle bunch and rarely listened. We needed reliability, not superstition.

We had to face the truth. Our old friend just couldn’t keep up.

Moving on to greener pastures

The final straw was the realization that we had become full-time YAML therapists. It was time to stop fixing and start building again. We didn’t just dump Compose; we replaced it, piece by piece, with tools that were actually designed for the world we live in now.

For real infrastructure, we chose real code

For our production and staging environments, we needed a serious, long-term commitment. We found it in the AWS Cloud Development Kit (CDK). Instead of vaguely describing our needs in YAML and hoping for the best, we started declaring our infrastructure with the full power and grace of TypeScript.

We went from a hopeful plea like this:

# docker-compose.yml
services:
  api:
    build: .
    ports:
      - "8080:8080"
    depends_on:
      - database
  database:
    image: "postgres:14-alpine"

To a confident, explicit declaration like this:

// lib/api-stack.ts
import * as cdk from 'aws-cdk-lib';
import * as ecs from 'aws-cdk-lib/aws-ecs';
import * as ecs_patterns from 'aws-cdk-lib/aws-ecs-patterns';

// ... inside your Stack class
const vpc = /* your existing VPC */;
const cluster = new ecs.Cluster(this, 'ApiCluster', { vpc });

// Create a load-balanced Fargate service and make it public
new ecs_patterns.ApplicationLoadBalancedFargateService(this, 'ApiService', {
  cluster: cluster,
  cpu: 256,
  memoryLimitMiB: 512,
  desiredCount: 2, // Let's have some redundancy
  taskImageOptions: {
    image: ecs.ContainerImage.fromRegistry("your-org/your-awesome-api"),
    containerPort: 8080,
  },
  publicLoadBalancer: true,
});

It’s reusable, it’s testable, and it’s cloud-native by default. No more crossed fingers.

For local development, we found a better roommate

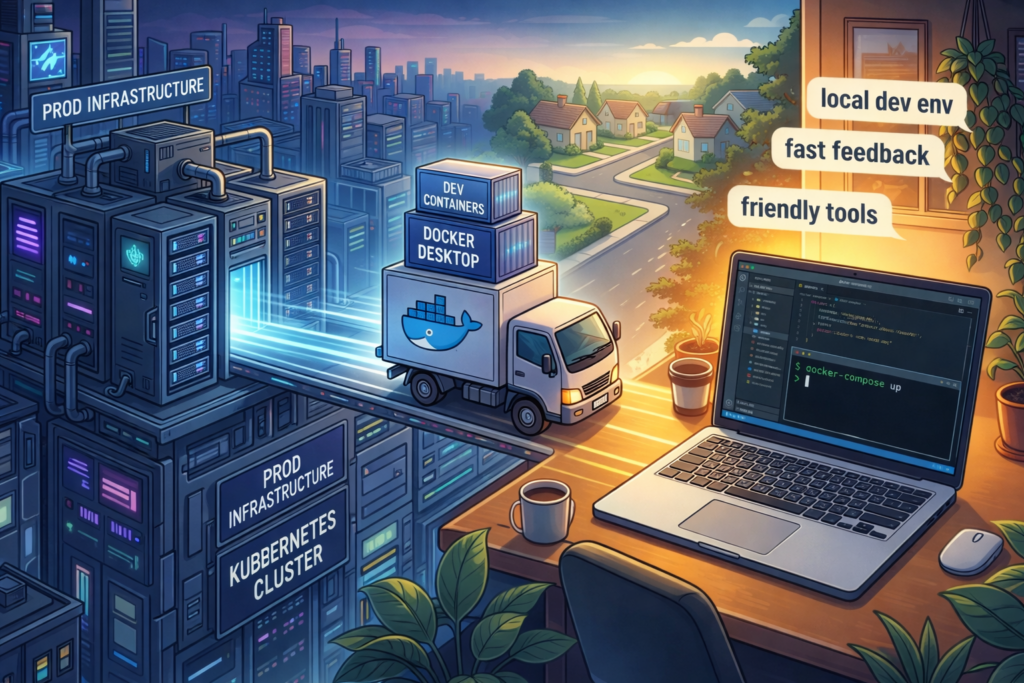
Onboarding new developers had become a nightmare of outdated README files and environment-specific quirks. For local development, we needed something that just worked, every time, on every machine. We found our perfect new roommate in Dev Containers.

Now, we ship a pre-configured development environment right inside the repository. A developer opens the project in VS Code, it spins up the container, and they’re ready to go.

Here’s the simple recipe in .devcontainer/devcontainer.json:

{
  "name": "Node.js & PostgreSQL",
  "dockerComposeFile": "docker-compose.yml", // Yes, we still use it here, but just for this!
  "service": "app",
  "workspaceFolder": "/workspace",

  // Forward the ports you need
  "forwardPorts": [3000, 5432],

  // Run commands after the container is created
  "postCreateCommand": "npm install",

  // Add VS Code extensions
  "extensions": [
    "dbaeumer.vscode-eslint",
    "esbenp.prettier-vscode"
  ]
}

It’s fast, it’s reproducible, and our onboarding docs have been reduced to: “1. Install Docker. 2. Open in VS Code.”

To speak every Cloud language, we hired a translator

As our ambitions grew, we needed to manage resources across different cloud providers without learning a new dialect for each one. Crossplane became our universal translator. It lets us manage our infrastructure, whether it’s on AWS, GCP, or Azure, using the language we already speak fluently: the Kubernetes API.

Want a managed database in AWS? You don’t write Terraform. You write a Kubernetes manifest.

# rds-instance.yaml
apiVersion: database.aws.upbound.io/v1beta1
kind: RDSInstance
metadata:
  name: my-production-db
spec:
  forProvider:
    region: eu-west-1
    instanceClass: db.t3.small
    masterUsername: admin
    allocatedStorage: 20
    engine: postgres
    engineVersion: "14.5"
    skipFinalSnapshot: true
    # Reference to a secret for the password
    masterPasswordSecretRef:
      namespace: crossplane-system
      name: my-db-password
      key: password
  providerConfigRef:
    name: aws-provider-config

It’s declarative, auditable, and fits perfectly into a GitOps workflow.

For the creative grind, we got a better workflow

The constant cycle of code, build, push, deploy, test, repeat for our microservices was soul-crushing. Docker Compose never did this well. We needed something that could keep up with our creative flow. Skaffold gave us the instant gratification we craved.

One command, skaffold dev, and suddenly we had:

  • Live code syncing to our development cluster.
  • Automatic container rebuilds and redeployments when files change.
  • A unified configuration for both development and production pipelines.

No more editing three different files and praying. Just code.

The slow fade was inevitable

Docker Compose was a fantastic tool for a simpler time. It was perfect when our team was small, our application was a monolith, and “production” was just a slightly more powerful laptop.

But the world of software development has moved on. We now live in an era of distributed systems, cloud-native architecture, and relentless automation. We didn’t just stop using Docker Compose. We outgrew it. And we replaced it with tools that weren’t just built for the present, but are ready for the future.

Essential tactics for accelerating your CI/CD pipeline

A sluggish CI/CD pipeline is more than an inconvenience, it’s like standing in a seemingly endless queue at your favorite coffee shop every single morning. Each delay wastes valuable time, steadily draining motivation and productivity.

Let’s share some practical, effective strategies that have significantly reduced pipeline delays in my projects, creating smoother, faster, and more dependable workflows.

Identifying common pipeline bottlenecks

Before exploring solutions, let’s identify typical pipeline issues:

  • Inefficient or overly complex scripts
  • Tasks executed sequentially rather than in parallel
  • Redundant deployment steps
  • Unoptimized Docker builds
  • Fresh installations of dependencies for every build

By carefully analyzing logs, reviewing performance metrics, and manually timing each stage, it became clear where improvements could be made.

Reviewing the Initial Pipeline Setup

Initially, the pipeline consisted of:

  • Unit testing
  • Integration testing
  • Application building
  • Docker image creation and deployment

Testing stages were the biggest consumers of time, followed by Docker image builds and overly intricate deployment scripts.

Introducing parallel execution

Allowing independent tasks to run simultaneously rather than sequentially greatly reduced waiting times:

jobs:
  test:
    runs-on: ubuntu-latest
    steps:
      - uses: actions/checkout@v3
      - name: Install Dependencies
        run: npm ci
      - name: Run Unit Tests
        run: npm run test:unit

  build:
    runs-on: ubuntu-latest
    steps:
      - uses: actions/checkout@v3
      - name: Install Dependencies
        run: npm ci
      - name: Build Application
        run: npm run build

This adjustment improved responsiveness, significantly reducing idle periods.

Utilizing caching to prevent redundancy

Constantly reinstalling dependencies was like repeatedly buying groceries without checking the fridge first. Implementing caching for Node modules substantially reduced these repetitive installations:

- name: Cache Node Modules
  uses: actions/cache@v3
  with:
    path: ~/.npm
    key: ${{ runner.os }}-npm-${{ hashFiles('**/package-lock.json') }}
    restore-keys: |
      ${{ runner.os }}-npm-

Streamlining tests based on changes

Running every test for each commit was unnecessarily exhaustive. Using Jest’s –changedSince flag, tests became focused on recent modifications:

npx jest --changedSince=main

This targeted approach optimized testing time without compromising test coverage.

Optimizing Docker builds with Multi-Stage techniques

Docker image creation was initially a major bottleneck. Switching to multi-stage Docker builds simplified the process and resulted in smaller, quicker images:

# Build stage
FROM node:18-alpine as builder
WORKDIR /app
COPY package*.json ./
RUN npm ci
COPY . .
RUN npm run build

# Production stage
FROM nginx:alpine
COPY --from=builder /app/dist /usr/share/nginx/html

The outcome was faster, more efficient builds.

Leveraging scalable Cloud-Based runners

Moving to cloud-hosted runners such as AWS spot instances provided greater speed and scalability. This method, especially beneficial for critical branches, effectively balanced performance and cost.

Key lessons

  • Native caching options vary between CI platforms, so external tools might be required.
  • Reducing idle waiting is often more impactful than shortening individual task durations.
  • Parallel tasks are beneficial but require careful management to avoid overwhelming subsequent processes.

Results achieved

  • Significantly reduced pipeline execution time
  • Accelerated testing cycles
  • Docker builds ceased to be a pipeline bottleneck

Additionally, the overall developer experience improved considerably. Faster feedback cycles, smoother merges, and less stressful releases were immediate benefits.

Recommended best practices

  • Run tasks concurrently wherever practical
  • Effectively cache dependencies
  • Focus tests on relevant code changes
  • Employ multi-stage Docker builds for efficiency
  • Relocate intensive tasks to scalable infrastructure

Concluding thoughts

Your CI/CD pipeline deserves attention, perhaps as much as your coffee machine. After all, neglect it and you’ll soon find yourself facing cranky developers and sluggish software. Give your pipeline the tune-up it deserves, remove those pesky friction points, and you might just find your developers smiling (yes, smiling!) on deployment days. Remember, your pipeline isn’t just scripts and containers, it’s your project’s slightly neurotic, always evolving, very vital circulatory system. Treat it well, and it’ll keep your software sprinting like an Olympic athlete, rather than limping like a sleep-deprived zombie.

Essential Dockerfile commands for DevOps and SRE engineers

Docker has become a cornerstone technology for building and deploying applications in modern software development. At the heart of Docker lies the Dockerfile, a configuration file that defines how a container image should be built. This guide explores the essential commands that every DevOps engineer must master to create efficient and secure Dockerfiles.

Essential commands

1. RUN vs CMD: Understanding the fundamentals

The RUN command executes instructions during image build, while CMD defines the default command to run when the container starts.

# RUN example
RUN apt-get update && \
    apt-get install -y python3 pip && \
    rm -rf /var/lib/apt/lists/*

# CMD example
CMD ["python3", "app.py"]

2. Multi-Stage builds: Optimizing image size

Multi-stage builds allow you to create lightweight images by separating the build and runtime environments.

# Build stage
FROM node:16 AS builder
WORKDIR /build
COPY package*.json ./
RUN npm install
COPY . .
RUN npm run build

# Production stage
FROM nginx:alpine
COPY --from=builder /build/dist /usr/share/nginx/html

3. EXPOSE: Documenting ports

EXPOSE documents which ports will be available at runtime.

EXPOSE 3000

4. Variables with ARG and ENV

ARG defines build-time variables, while ENV sets environment variables for the running container.

ARG NODE_VERSION=16
FROM node:${NODE_VERSION}

ENV APP_PORT=3000
ENV APP_ENV=production

5. LABEL: Image metadata

Add useful metadata to your image to improve documentation and maintainability.

LABEL version="2.0" \
      maintainer="dev@example.com" \
      description="Example web application" \
      org.opencontainers.image.source="https://github.com/user/repo"

6. HEALTHCHECK: Container health monitoring

Define how Docker should check if your container is healthy.

HEALTHCHECK --interval=45s --timeout=10s --start-period=30s --retries=3 \
    CMD wget --quiet --tries=1 --spider http://localhost:3000/health || exit 1

7. VOLUME: Data persistence

Declare mount points for persistent data.

VOLUME ["/app/data", "/app/logs"]

8. WORKDIR: Container organization

Set the working directory for subsequent instructions.

WORKDIR /app
COPY . .
RUN npm install

9. ENTRYPOINT vs CMD: Execution control

ENTRYPOINT defines the main executable, while CMD provides default arguments.

ENTRYPOINT ["nginx"]
CMD ["-g", "daemon off;"]

10. COPY vs ADD: File transfer

COPY is more explicit and preferred for local files, while ADD has additional features like auto-extraction of archives.

# COPY examples - preferred for simple file copying
COPY package*.json ./                  # Copy package.json and package-lock.json
COPY src/ /app/src/                    # Copy entire directory

# ADD examples - useful for archive extraction
ADD project.tar.gz /app/               # Automatically extracts the archive
ADD https://example.com/file.zip /tmp/ # Downloads and copies remote file

Key differences:

  • Use COPY for straightforward file/directory copying
  • Use ADD when you need automatic archive extraction or remote URL handling
  • COPY is preferred for better transparency and predictability

11. USER: Container security

Specify which user should run the container.

RUN adduser --system --group appuser
USER appuser

12. SHELL: Interpreter customization

Define the default shell for RUN commands.

SHELL ["/bin/bash", "-c"]

Best practices and optimizations

  1. Minimize layers:
    • Combine related RUN commands using &&
    • Clean up caches and temporary files in the same layer
  2. Cache optimization:
    • Place less frequently changing instructions first
    • Separate dependency installation from code copying
  3. Security:
    • Use official and updated base images
    • Avoid exposing secrets in the image
    • Run containers as non-root users

Putting it all together

Mastering these Dockerfile commands is essential for any modern DevOps or SRE engineer. Each instruction is crucial in creating efficient, secure, and maintainable Docker images. By following these best practices and understanding when to use each command, you can create containers that not only work correctly but are also optimized for production environments.

A good Dockerfile is like a well-written recipe: it should be clear, reproducible, and efficient. The key is finding the right balance between functionality, performance, and security.